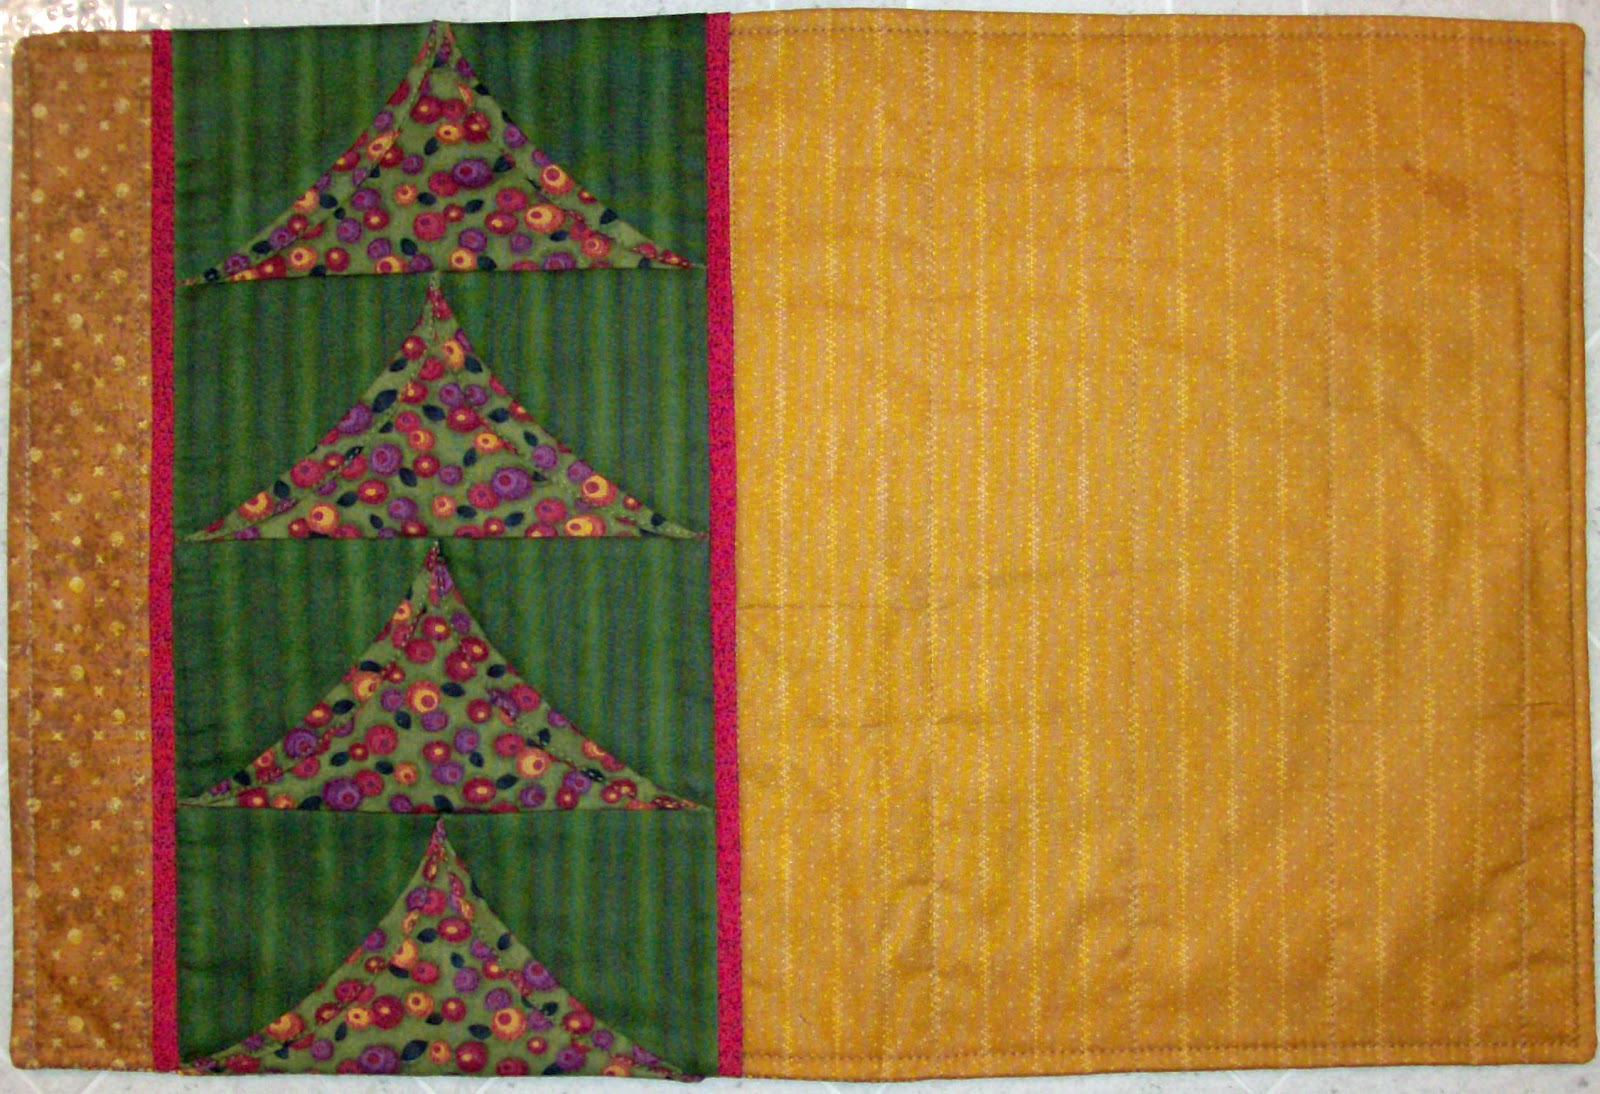
Folded Geese Placemat
These instructions are for ONE placemat. In ( ) are the
fabric amounts if you plan to make 4 placemats.
Use 1/4” seams throughout.
Supplies:
Main top fabric: fat
¼ (2/3 yard)
Left Side Bar:
2-1/2” x 12-1/2” (fat 1/4)
Background for geese:
1/8 yard (1/3 yard)
Geese: 1/8 yard (1/3
yard)
Flat piping: 1/8 yard
(long ¼ yard cut)
Backing: fat ¼ (2/3
yard)
Batting: one piece
20” x 14” (2/3 yard)
Cut:
1 Backing fabric 18-1/2” x 12-1/2”
1 Main top fabric (right side section) 12-1/2” x 10-1/2”
1 Left side section strip 12-1/2” x 2-1/2”
2 Piping (no cording in this piping) 1” x 12-1/2”
Background for geese blocks: 8 pieces 3-1/2” x 3-1/2”
Folded geese pieces: 4 rectangles 6-1/2” x 3-1/2”
Assembly:
Make the flying geese
blocks first. Fold one rectangle in half
WST (Wrong Sides Together) with short ends touching. (It will now measure
3-1/2” x 3-1/4”). Place this folded piece
between two background squares so the right sides of each background are
touching the folded piece, making sure the raw edges of ALL pieces are
aligned. The folded piece will be
1/4" short of aligning with the raw edges of the background squares.
 |
Diagram at left shows folded piece on bottom background square. The square at right is right side up and has to be flipped right side down on top of the folded square.
|
Sew a 1/4" seam from the corner where all raw edges
align, down the edge, ending at the corner below the folded edge of the flying
geese piece. Turn the sewn piece 90º.
Open one background
piece flat. Press seam. Open the folded section so that bottom
corners match and a triangle is formed.
Press flat. Pin corners in
place. Repeat for 3 more flying geese
blocks. The point of the triangle will
be ¼” below the raw edge, this is the space for the seam allowance when sewing
the blocks together. Sew the 4 blocks together into a column that measures
6-1/2” x 12-1/2”.
Fold the two piping strips in half lengthwise with Right
Sides Together (RST) and press. Lay one
piping strip on the left side of the flying geese unit so raw edges align and
the piping is covering the corners of the triangles. Place the left side strip over (right side
covering) the piping strip. Pin along
the 12-1/2” edge and sew all layers.
Press open so the seams are all under the flying geese side of the
piece.
Place the other piping strip over the flying geese unit on
the right edge, raw edges aligned. Place
the Main front fabric on top of these pieces so the right side is down. Pin the long 12-1/2” edge and sew through all
layers. Press open so all raw edges are
under the flying geese unit.
The flying geese triangles have a long diagonal bias side
which is open. This can be left open,
topstitched down, or you can do as I did:
Roll the bias edges toward the center of the triangles, hold in place
with a bit of
Roxanne’s Glue Baste It and then topstitch in place.
Quilting the placemat:
I am not working with the backing yet!
I put the top of the placemat on the batting, spray basted it in place,
or you can pin it. I used the walking
foot to sew some straight lines down the main fabric piece of the placemat top
and the side strip on the left. I then
sewed in the ditch under the 3 top triangles.
Finishing: Trim the
batting to the size of the placemat top.
Place the backing on the placemat top, RST. Begin sewing at the middle of the main fabric
of the placemat, 1/4” around the edges and stopping about 4” from where you
began. Trim the corners so when the
piece is turned right sides out they will make a nice point. After turning it inside out, press all edges
and sew the opening closed. Topstitch
around the edges 1/8” or 1/4" from the edge.
Tip: To help me keep
the top and bottom of turned items well aligned so the backing doesn’t show on
the front, or vise versa, I dampen my fingers and roll the seams so they are
aligned and iron immediately.
I hope you try this project, or change it up a bit with
colors or designs. Happy Sewing!


