1/28/2016

A Tease for February 1 Reveal

I finished my project for the Four-in-Art Quilt group reveal coming on February 1, 2016. 
I will say that it is time to clean up after a good amount of work on this project. That means I won't be sewing for a bit.
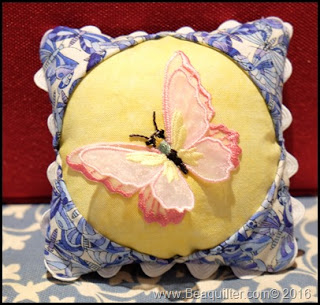
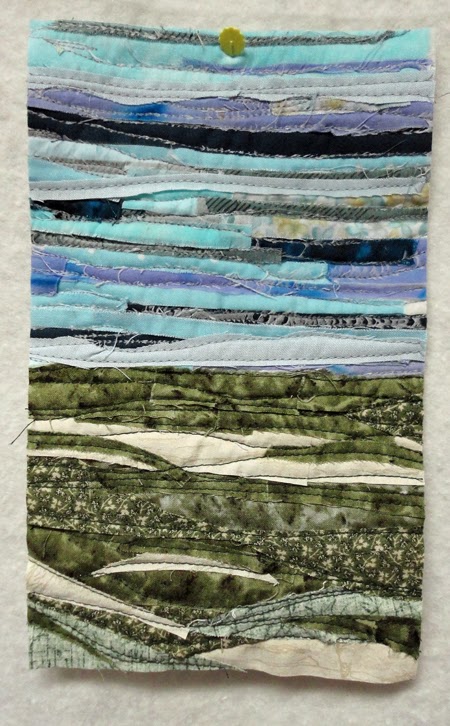
As a tease, I want to give you just a few cropped images of the project and invite you back on February 1 for the full post and to visit the other members of the group to see their projects. 


Any ideas?

1/19/2016

Wonky Houses and Trees from Scraps

It's no secret in my quilting circle that I keep scraps. (I figured I paid for the fabric and I can surely make things with the leftovers.) I have made a number of mug rugs. I have stacks of HST sewn, waiting to be put into some quilted project. My new Accuquilt Go! has helped reduce the size of the storage drawers needed as I cut various shapes. And presently, those shapes are stored in one divided box. 

But, on a visit to Persimon Dreams' website (HERE), the Scrap Quilt Challenge 2016 caught my eye. On the 15th of the month for 10 months a different designer will be featured.  They'll be sharing a fun block and/or tip or trick for using up scraps! So, I began the other night. When I had a few minutes to spare doing something that didn't need precision or concentration, I made some blocks that I will show you now. 


I don't know where it will take me, but I'm having fun sewing these wonky blocks. 
If you have scraps, perhaps you would like to follow this scrap challenge.


1/16/2016

3 Pincushions Swapped

The pincushion swap that Beaquilter is hosting HERE has been fun this month. 
I made my January and February pincushions and sent them out. The one for February was being sent to Norway and I wanted give it enough time to arrive. Guess it got there a bit early, but the recipient was very happy. 

So here is what the mail carriers have delivered: 

My January pincushion went to Bea. 


My February one went to Laila. The design I made was a 4-patch flower with 3-D leaves on each side. 


The one I received from Laila arrived today and she made it in my favorite colors! 


1/12/2016

Art Quilts


Val's Quilting Studio


I am joining in the Tuesday Archives Linky at Val's Quilting Studio. Today's theme is Art Quilts. I have made one page with my past posts. Thank you Val for a venue to share with others what I have made. Perhaps you will glean some inspiration from some of my works. Email me if you have any questions. Thanks for visiting. 


FABRIC LANDSCAPE PANELS COMPLETED (Full post HERE)


Miriam and I finished stapling the fabric panels to the wooden frames. Here is what the finished piece looks like. 


I kept a bit of the floor lamp and rug in the photo to give you an idea of the size. Each panel is 51" high and the center one is 40" wide. The other two are 35" wide. We will have 2" between each panel when it is hung. 

MINI LANDSCAPE FROM AQS CLASS (Full post HERE)

have to post a photo of the 5" x 7" mini landscape I made in Lenore Crawford'sclass on the last day. She calls her technique Mini Blended Fabric Collages. It is a mosic technique. The fabric is cut and repositioned just over the piece next to it. Everyone in the class had a blast...and we all went away with a project we were proud of. Now to mount it.


SCRAPS PUT TO USE (Full post HERE)

I can't throw away most scraps. So from the projects I have been doing, I am usingAngie Padilla's suggestion of turning  them into fabric collages. (She has lots of other ideas for scraps at her website.) So I lay them on a batting scrap near the cutting table to be sewn and then cut into inchies, made into a cosmetic case, etc. Presently, I am making a tiny landscape in the style (and I use that word loosely) ofAnn Loveless, from whom I took a class a few years ago.


LANDSCAPE WORKSHOP (Full post HERE)

Today I attended a workshop taught by Ann Loveless.  The Tall Pine Quilters Guild had her come.  She taught us how to make a lake collage wall hanging.  By the time the 5 hours were up, we had the sky, water and sandy beach done.  The next step was to add the trees and ground details.  I took 2 hours more before the guild meeting to add the trees, leaves and begin the grasses.  Here is my progress up to this point.


Ann spoke at our guild meeting that night.  She had a PowerPoint presentation showing her studio and how she makes her art quilts.  She described her three styles.  I returned home very excited to finish my project.

1/06/2016

6 Days: Quilting Goals on Track

I am happy to say that I have met my quilting goals for the first 6 days of the new year. 

I completed another pincushion today for the swap. I can't show that until my swap partner gets it. I will be sending it tomorrow.

I am now a member of the Mid-Century Modern Bee. I am excited to be a part of this talented group of quilters. I worked on my blocks for this month's Queen Bee today, finished them and sent them off to her in the mail. Yea! 

I can't show a photo of the completed blocks, because it's in pattern development.  BUT, I will share with you how the seams of some very longs strips that I pressed turned out very STRAIGHT. (Oh, I do so like the blue I used in the blocks.)


I bought the Strip Stick a few years ago based on my friend's recommendation.
The introduction on the website HERE says, "The Strip Stick, so-named for pressing seams when strip quilting, makes ironing seams a snap without distorting previously pressed seams.  Other uses include the ability to press intricate piecing, such as one-block wonders and other blocks with intersecting seams. Quilters are excited to have a tool that not only keeps the seams very straight, but also cuts pressing time to a minimum!"


I have been happy with the results I get when pressing strips. Below, I pressed the seams toward the blue fabric. The previously pressed seams were not distorted by the iron. The Strip Stick is curved with minimal padding and a muslin sleeve on it. The curve is what allows me to press just one seam at a time. I have used it to press seams on blocks and have had excellent results. 


There is a video on the Strip Stick website showing how to use this product. If you have an inkling to know more about it, watch the video. (I do not have any affiliation with the company, I just want to share with you something I use with great results.

I am off to join A New Year A New Creative You at Embroider It for the last day of focusing on creativity. If you missed any of the 6 days, click the link and check it out. 

What goal have you accomplished this week?

1/04/2016

New Year for Quilting Goals

Welcome to the new year. I wish each of you quilt-filled progress as you make your way through each week of 2016. 

Goals. Setting goals for the start of a new year is something I have done (and many of you as well) for many years. Sometimes I succeed in accomplishing one or two; but I am human, and thus there is always room to improve each year. 


So, as I ushered in the new year quietly at home with my hubby, I set my quilting goals. 

First, I will try to keep my design area more organized and put things where they belong when finished using them. I want to progress in creating and not have to spend time searching for a tool or such.

Secondly, I bought a planner and will use it to stay on top of schedules and deadlines. Those birthday and holiday gifts, guild challenges, blog posts and pattern designs will get done in time!

And lastly (I don't want to have too many goals to keep in my mind), I am going to finish projects I begin.  

On January 1, I participated in the Merry Mayhem Mystery Quilt. One of 7 clues was given each hour. I worked diligently on each step of the process and after breaking for dinner, I was determined to meet my goal of finishing projects. Below is the top I completed in one day! 


I am following the EmbroiderIt blog in a series of 6 exercises (one per day) about enjoying the moment and enjoying the process of being creative. It is simple but has given me perspective on how to work better and more efficiently. Check it out.


I finished the January pincushion for the swap in which I am participating and sent it out today. That is a good feeling. I can't show it until my swap partner gets it. HERE is the link. 

Happy quilting.