2/23/2016

Tuesday Archives and Free Pattern Link

Val's Quilting Studio

Today, Val's Tuesday Archives features BUTTONS. I am posting the blog post where I used buttons in a cute wallhanging. I also have a free pattern download for the fence block I designed and used in the pattern. The fence block is so versitile it can be used for any season.

Tell me what season you would use it. 


Any day quilting is a Happy Day!
Have a Happy Day.

2/22/2016

Island Batik Blog Hop and More

PTA-Hop-Along-With-Us

Island Batiks has a great blog hop going on until March 4 with great giveaways. 
CLICK HERE to find out all about it.
The projects that the Island Batik Ambassadors have been posting are great!

If you are looking for my post about using EQStitch to design coloring pages


2/21/2016

Coloring Page with EQStitch

The EQ Behind the Mouse Blog "Sunday Stitch Tutorial #30" showed how to create a coloring page. You can find the tutorial page HERE.

Lately, I have seen many posts about adult coloring pages from various publishers. I have purchased a few books at the craft stores. Even my adult daughters have purchased some of the books. Coloring is very relaxing for many people.

I designed one page in EQStitch an was quite pleased with the result. Now to print and color it. 


With EQStitch, you can design your own pages which can be printed in the size desired. I thought they could also be printed on fabric and colored with Derwent Inktense pencils and used in quilting or fabric art projects. The YouTube tutorial found HERE was posted by Smith-Owen Sewing & Quilting, my sewing machine service store and a whole lot more. 

I thought I could try printing the images on shrink plastic, coloring them and seeing how they shrink. 

How can you see using these with the various printers and media available these days?

If you would like a copy of my page, you can download it free HERE

Color for a wonderful day!

2/19/2016

Cut Loose Patterns Featured Designer


Today I am the featured designer on the Cut Loose Press Facebook page. I was on the road today, so this is a late post; but want to invite all of you to visit their page HERE.

I am working on two new patterns that I will be submitting soon, for availability this spring. 

Available from your local quilt shop are my patterns:


Tree-Mendous Possibilities: a pattern from which you can make 2 different quilts with very little fabric waste. How thrifty is that! Both quilts are quick and easy to make. Sew a quilt for any of a variety of occasions by simply changing the materials you use. Ideas are given in the pattern (maybe with photos, fussy cutting, or signatures).


The Rings Placemat Set: make 4 placemats with your favorite color scheme or collection of fabrics. With the few leftover rings, you can sew a table runner. Use in your own home, or give as a gift. 

I appreciate your comments and thank you for your visit. 


2/08/2016

My Island Batik Ambassadorship

I was so excited to get an email at the end of January telling me that I had been selected as an ISLAND BATIK ambassador. I can barely wait to get started. 

The email came while on a short vacation to Florida. So I turned my thoughts to taking cool photos that might give me inspiration for quilts and blocks using Island Batiks fabrics. 

As I think of what lies ahead this year, I'm will share some photos of my trip. EQ7 will help me explore quilting possibilities. Take a look, let me know which photo inspires you. 

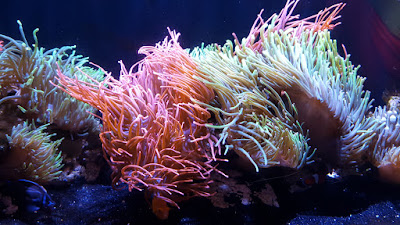
This post has a few photos from the Florida Aquarium in Tampa. 

The colors are neutral and I really like the pop of orange on the one fish.

This is the 3-D mural on the wall of the entry. 
I like the colors and the movement in it.

Blue has always been my favorite color. 
The little splashes of color will add interest to a quilt.

Maybe some curves.

Soft colors, lines, strips?

Not sure here.

I'll think about this one. But the fragile-looking seahorses are so cute.

Lace and circles.

Blues, yellows and a bit of orange with a darker background?

Bright colors? Triangles?

Leafiness, lines, reflection.

Hmmmm.....

I'll post some other photos in my next blog. I really see potential in the palm trees. Thank you for visiting. 


2/02/2016

Four-in-Art 2016 February Project


The first 2016 "project reveal" for the Four-in-Art Group was yesterday. 
I hope you got to see all of the members' projects. 
What did you think of them? How did you like their use of color? 

Today I am going to tell you about how I designed my quilted sunflower wall hanging, which I titled, "A Closer Look into the Stem."


We were charged with using a sub-category of MICROSCOPIC in this color-themed project.

We were to find something we were interested in and look at it on a microscopic level. (It didn't mean our quilt needed to be microscopic). Some examples of topics to Google with the word "microscopic" were: sea water, viruses, mountains, chocolate, sugar, and ice. When exploring many of these elements on a microscopic level there could be repeating geometric shapes or interesting organic shapes that can be applied to quilting inspiration. 

This was a tough project for me. 
I understand "some" uses of the color wheel and the choices one can make;
but, I have difficulty making the choices in fabrics.


So, I put that on hold and worked my way through the microscopic aspect of this project. 
I looked at butterfly wings, chemicals, minerals, gems, plant cells, bird feathers and bug parts! 
The choices were over-whelming. My Pinterest Board is bulging.
(The United Kingdom has the Micropolitan Museum 
with curated exhibition halls. Really!) 

I found macrophotographic is the term used for microscopic photos. 
Some of those were cross-sections of flower stems.
There was a really cool one of an orchid and some of sunflowers, too.

Image courtesy of foto76 at FreeDigitalPhotos.net

I like sunflowers. The cross-sections could be drawn.
(I am glad we have 3 months to work on a project,
because I was down to the final 3 weeks.)

I would use the cross-section of a stem as the center of the flower. 
I printed it onto fabric in the computer printer. 
I used black thread to stitch around all the parts of the stem cross-section.


I found a sunflower coloring page that was free to use but not redistribute.
I enlarged it to fit the petals around the 8" center I had printed on fabric.

I used a glue stick to keep all the petals in place while I sewed the center (above).


I worked with yellows to yellow-orange colors and chose a green background. 
I know this was not exactly the analogous color scheme I had looked at on the color wheel, but I liked the range of yellows with the green background. 


I had a number of thread colors to work with and found that the rayon threads gave more pizzaz to the petals than the cotton threads. 

The petals were pretty flat (below) and needed more color so I added other fabrics to the petals. I wanted the microscopic stem to show as such, so I didn't put any color there.


The petals were quilted to the batting (see the mess on the back). 


When quilting all three layers, 
I wanted the quilting to be simple and not distract from the flower. 
I was pleased with the box overlapped by the on-point box and set behind the flower. 


I put triangle corners on the back for hanging the quilt.
I do this before sewing the binding on.
I am able to place a dowel in the triangle pockets and hang the quilt
on one nail put into the wall.


What colors would you use to create a project?
Is there something microscopic that interests you?
Leave a message and let me know.

I think I might try something with a butterfly wing just for fun. 


2/01/2016

Four-in-Art Reveal


The start of the new year for the Four-in-Art Quilt group begins with today's reveal.


The theme for this series of quilted projects is Color. 
Our sub-theme for this quarter was "microscopic." 

Tomorrow's post is about my journey with this project. 

Now, I want to show the small wall hanging I made for this project.
  

"A Closer Look into the Stem" wall hanging measures 20" x 20". 
The petals are raw edge pieces. 
The center (a microscopic illustration of a stem) on fabric, 
which you see below, was quilted to a layer of batting.


as were the petal pieces (seen below).


This was put onto the backing fabric and I quilted around the main areas of the piece. 


The triangle corners hold a dowel to hang the quilt with one nail in the wall. 

I hope you will look at the other members' projects 
and visit me tomorrow to for a bit more detail on the design details of my project. 

Bettyhttps://www.flickr.com/photos/toot2
Camillahttp://faffling.blogspot.co.nz/
Catherinehttp://www.knottedcotton.com
Elizabeth http://www.opquilt.com
Janine http://www.rainbowhare.com
Nancy http://www.patchworkbreeze.blogspot.com
Rachel http://www.rachel-thelifeofriley.blogspot.com
Simone http://quiltalicious.blogspot.com
Susan http://patchworknplay.blogspot.com