Showing posts with label Tuesday Archives. Show all posts

7/10/2018

Lap Quilts Revisited

Today I am joining Val's Quilting Studio in the Tuesday Archives HERE. This week's theme is Lap Quilts.

I have been vacationing for the last week in the Upper Peninsula of Michigan. It was the start of my 4th week of healing from foot surgery and great to go somewhere. I'm not driving yet, so I am dependent upon others. I just relaxed and it was GREAT.

But, I'm back and thought I would put together a post condensation of some of my blogs where I showed lap quilts I had made.


I chose  to donate a lap quilt I made, called Flower Boxes, for the church raffle this coming weekend.  My DH took this photo, not the best, but it is the only one I now have. It is much prettier than the picture indicates. I quilted it this past fall on the Sweet 16 at the art studio using Sally Terry's Leaf designs. I see on her website that she has refined the technique and calls it SHADOW RHYTHMS. I took her class at the AQS show this past August. The technique is very easy to learn and the quilts look great. Click HERE to check out the video on her website for more information. You can find the entire blog post HERE


I began this quilt after taking Susan Purney-Mark's class "Give and Take" 2 years ago at the AQS Show in Grand Rapids, MI.  I quilted it using techniques I learned in Sally Terry's class at the same show. I put the bindings on this past October at a quilt retreat. And now it is on my couch as a lap throw. The entire blog post is HERE.


I am sure every quilter has been asked to help someone out with a quilt project.
My sister asked me to help with finishing the quilt she had started for her son. 
How can one say no to a sister?
This is a photo of the finished quilt. 
She purchased plaid and plain wool suiting pieces. 
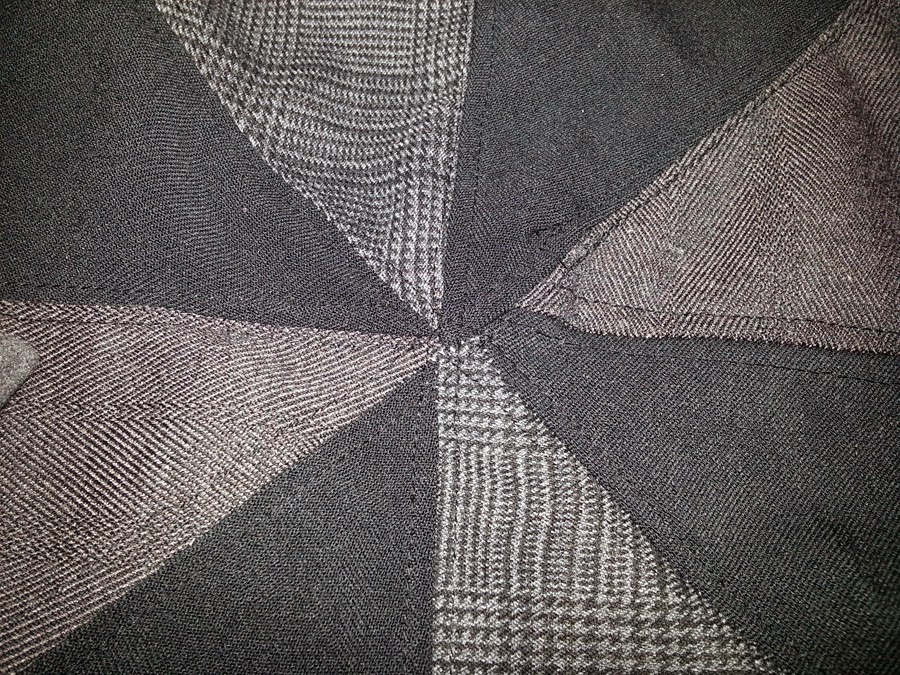
When I got the top, she had the pinwheels sewn. 
Below, you will find what I did to finish the quilt. 


My sister has not made many square patch quilts and wasn't sure of the quilting process. She did not have much of each fabric and had already cut them into squares. I suggested she cut them diagonally to create more visual appeal. I never thought to suggest fusible interfacing for stabilization, so there was S-T-R-E-T-C-H.

After sewing the pinwheels together she asked for help with sandwiching and binding. She had purchased a felted wool for the backing. We thought including batting in the quilt would be much too hot. I suggested it be sewn as a self-binding blanket. (You can see Jenny Doan's demonstration HERE.) I thought large hand sewn quilting stitches to hold the layers from shifting would be cool. So, I took the project home and went at it.

You can read more about what I did HERE.

HERE is a top that was finished by my friend and longarm quilter, Michelle.  
This lap size Hunter Star quilt that I made quite a few years ago. The original blog had the finished photo, but the link is broken. I will have to search through my files for the photo.


Thank you for visiting Val's Quilting Studio and my blog. 
Have you made lap quilts for special people or to donate? 
What size do you like to make them? 

6/21/2017

Shop Hops Revisited

I am joining Val's Tuesday Archives with today's theme of Shop Hops.
Instead of linking each of my shop hop posts individually at Val's Quilting Studio, I am going to give you the links in this post.

My husband and I have taken a few trips south to warmer places for a little while in the winter. My husband doesn't mind stopping for me to have a short visit to some quilt shops along the way. But for some serious quilt shop hopping I have taken a yearly bus trip for four years that is filled with lots of stops at quilt shops in many of the states as well as seeing the sites as we travel. These bus trips have satisfied my desire to travel to places that my husband isn't really interested in.

So here are the posts that tell about the shops I have visited. Let me know if you have been to any of the same shops, or know of one that no one should miss.

Front Porch Quilt Shop

JEllen's House of Fabrics 

Cleveland ...By Way of Quilt Shops

Bolts of Fabric

Bus Trip During Row by Row

Robert's Quilt Shop So Many Fabrics

Missouri Star Quilt Company

New Mexico Quilt Shop

One Last Shop in New Mexico


2/23/2016

Tuesday Archives and Free Pattern Link

Val's Quilting Studio

Today, Val's Tuesday Archives features BUTTONS. I am posting the blog post where I used buttons in a cute wallhanging. I also have a free pattern download for the fence block I designed and used in the pattern. The fence block is so versitile it can be used for any season.

Tell me what season you would use it. 


Any day quilting is a Happy Day!
Have a Happy Day.

1/12/2016

Art Quilts


Val's Quilting Studio


I am joining in the Tuesday Archives Linky at Val's Quilting Studio. Today's theme is Art Quilts. I have made one page with my past posts. Thank you Val for a venue to share with others what I have made. Perhaps you will glean some inspiration from some of my works. Email me if you have any questions. Thanks for visiting. 


FABRIC LANDSCAPE PANELS COMPLETED (Full post HERE)


Miriam and I finished stapling the fabric panels to the wooden frames. Here is what the finished piece looks like. 


I kept a bit of the floor lamp and rug in the photo to give you an idea of the size. Each panel is 51" high and the center one is 40" wide. The other two are 35" wide. We will have 2" between each panel when it is hung. 

MINI LANDSCAPE FROM AQS CLASS (Full post HERE)

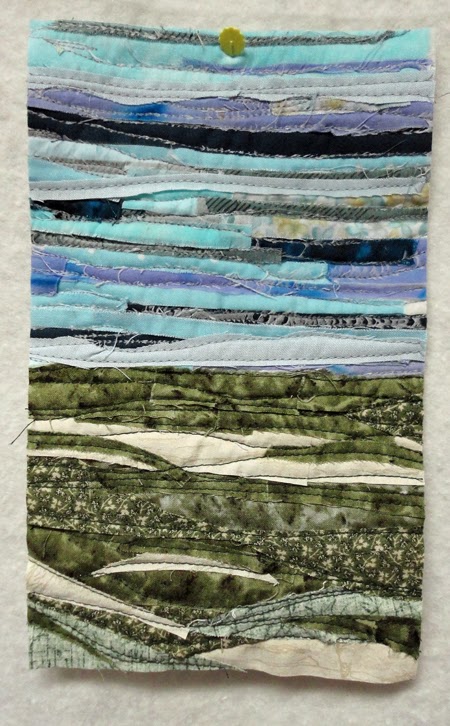
have to post a photo of the 5" x 7" mini landscape I made in Lenore Crawford'sclass on the last day. She calls her technique Mini Blended Fabric Collages. It is a mosic technique. The fabric is cut and repositioned just over the piece next to it. Everyone in the class had a blast...and we all went away with a project we were proud of. Now to mount it.


SCRAPS PUT TO USE (Full post HERE)

I can't throw away most scraps. So from the projects I have been doing, I am usingAngie Padilla's suggestion of turning  them into fabric collages. (She has lots of other ideas for scraps at her website.) So I lay them on a batting scrap near the cutting table to be sewn and then cut into inchies, made into a cosmetic case, etc. Presently, I am making a tiny landscape in the style (and I use that word loosely) ofAnn Loveless, from whom I took a class a few years ago.


LANDSCAPE WORKSHOP (Full post HERE)

Today I attended a workshop taught by Ann Loveless.  The Tall Pine Quilters Guild had her come.  She taught us how to make a lake collage wall hanging.  By the time the 5 hours were up, we had the sky, water and sandy beach done.  The next step was to add the trees and ground details.  I took 2 hours more before the guild meeting to add the trees, leaves and begin the grasses.  Here is my progress up to this point.


Ann spoke at our guild meeting that night.  She had a PowerPoint presentation showing her studio and how she makes her art quilts.  She described her three styles.  I returned home very excited to finish my project.

12/22/2015

Decorating with Quilts for Christmas

Val is having a Christmas Quilts Tuesday Archives link at her website HERE.


Val's Quilting Studio


As I have been getting ready for the holidays and guests for the past 2+ weeks, I decided I would invite you into my home via my blog to see how I used my quilts to decorate.

As guests enter, they see the Dresden Plate I made years ago in a class taught by Beth Ann Williams.


Further into the hallway is the Candle and Poinsettia I designed about 8 years ago while teaching at the local quilt shop. 


On the kitchen island is the Jodi Barrows design from one of her first books. I made this 2 years ago (do not remember the name of it) and Michelle Fialek quilted it. 


A small Friendship Star with Entwined Ribbons is on the dining table. I made this quilt at the first retreat I had ever attended, in 2000. One of the other quilters was making it and showed me how to cut and sew it. 


Moving into the the living room, I have the Basket pattern I designed while at the local quilt shop. I put poinsettia fabric in the basket for Christmas. (For other seasons or decor, use other fabrics.)


On the footstool at the end of the chair I placed a Lazy Angle design I made years ago...too many years to remember. But the colors are bright and it looks festive. 


My Christmas Crystals quilt is on the back of the couch (sofa) of which I am very proud. I took the "Crystals" pattern designed by Anna Laura Reidt and redid the color scheme. I made this in 2007 or 2008 (correct, no label is on the back yet) at the time, the pattern was out of print. I found THIS LINK where it is sold. I really was pleased at how the colors changed the quilt's appearance in the original blue and yellow scheme. 


The colors in the close up are truer to the actual colors.


And the guests at the house will sleep under the "1, 2, 3....Sew Easy" quilt I designed. It is a great pattern when one has a fat quarter collection of fabrics-or larger cuts. 


Thank you for visiting my home. 
I wish you and yours a joyous season
and a wonderful new year.

Nancy

6/09/2015

3 Fabric Baby Quilts


Tuesday Archives


This week the theme is receiving blankets. 


I posted a tutorial HERE. Use 3 cuts of fabric to make 3 small receiving size quilts, for a new baby. 


As an aside, to protect our precious little babies, I want to mention that I use 100% cotton, flannel and batting in any baby quilts I make. It was brought to my attention years ago that if polyesters and other man-made fibers (not natural fibers) get near a heat source, the material melts and sticks to the body. And, unfortunately, I was reminded of a 6-year-old girl I taught in class years ago. Flames started in their camper and a polyester blanket was used to smother the flames, but melted and stuck to her. She suffered severe burns. 

3/10/2015

Guy's Plaid Folksy Quilt

Tuesday Archives at Val's Quilting Studio motivated me to finish a draft of a post I began before Christmas. I hope you will find some tips, tricks or different methods of finishing a quilt as you read my blog post. 

I am sure every quilter has been asked to help someone out with a quilt project.
My sister asked me to help with finishing the quilt she had started for her son. 
How can one say no to a sister?
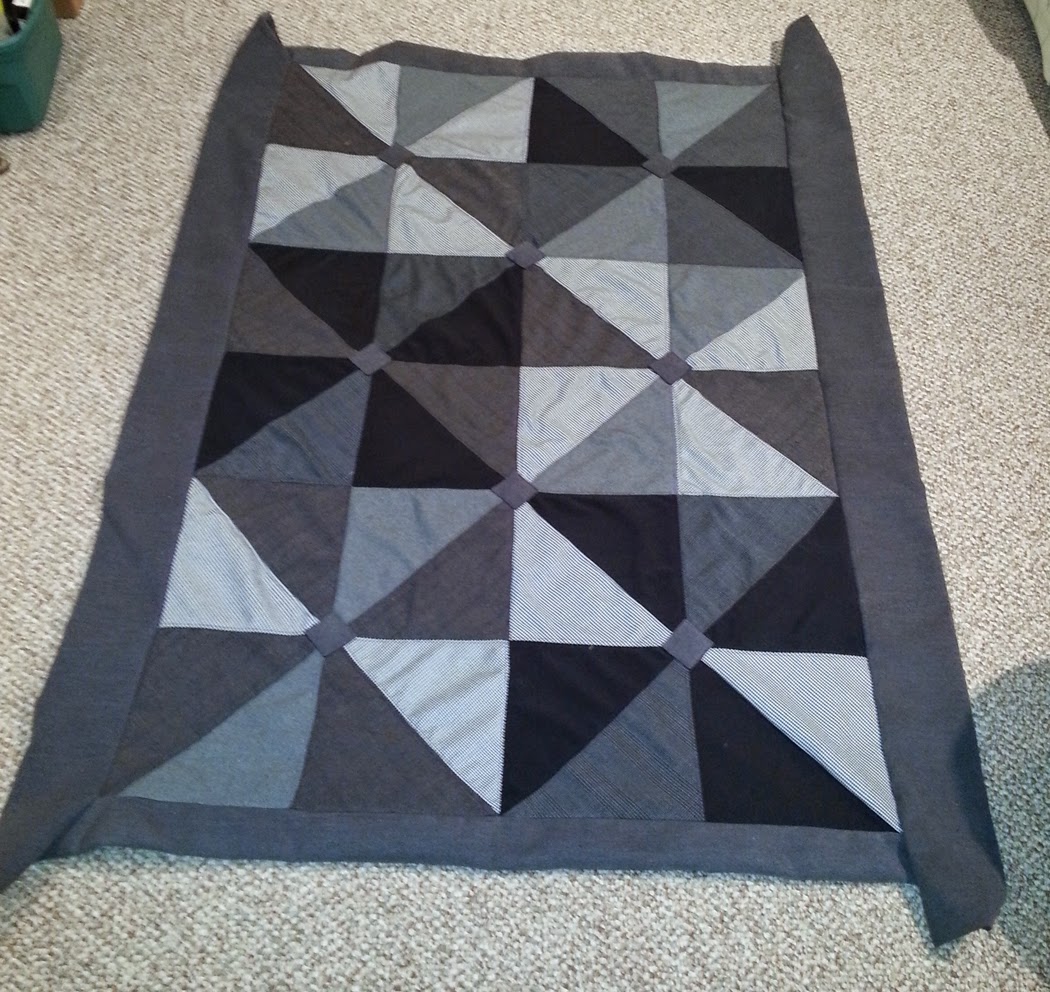
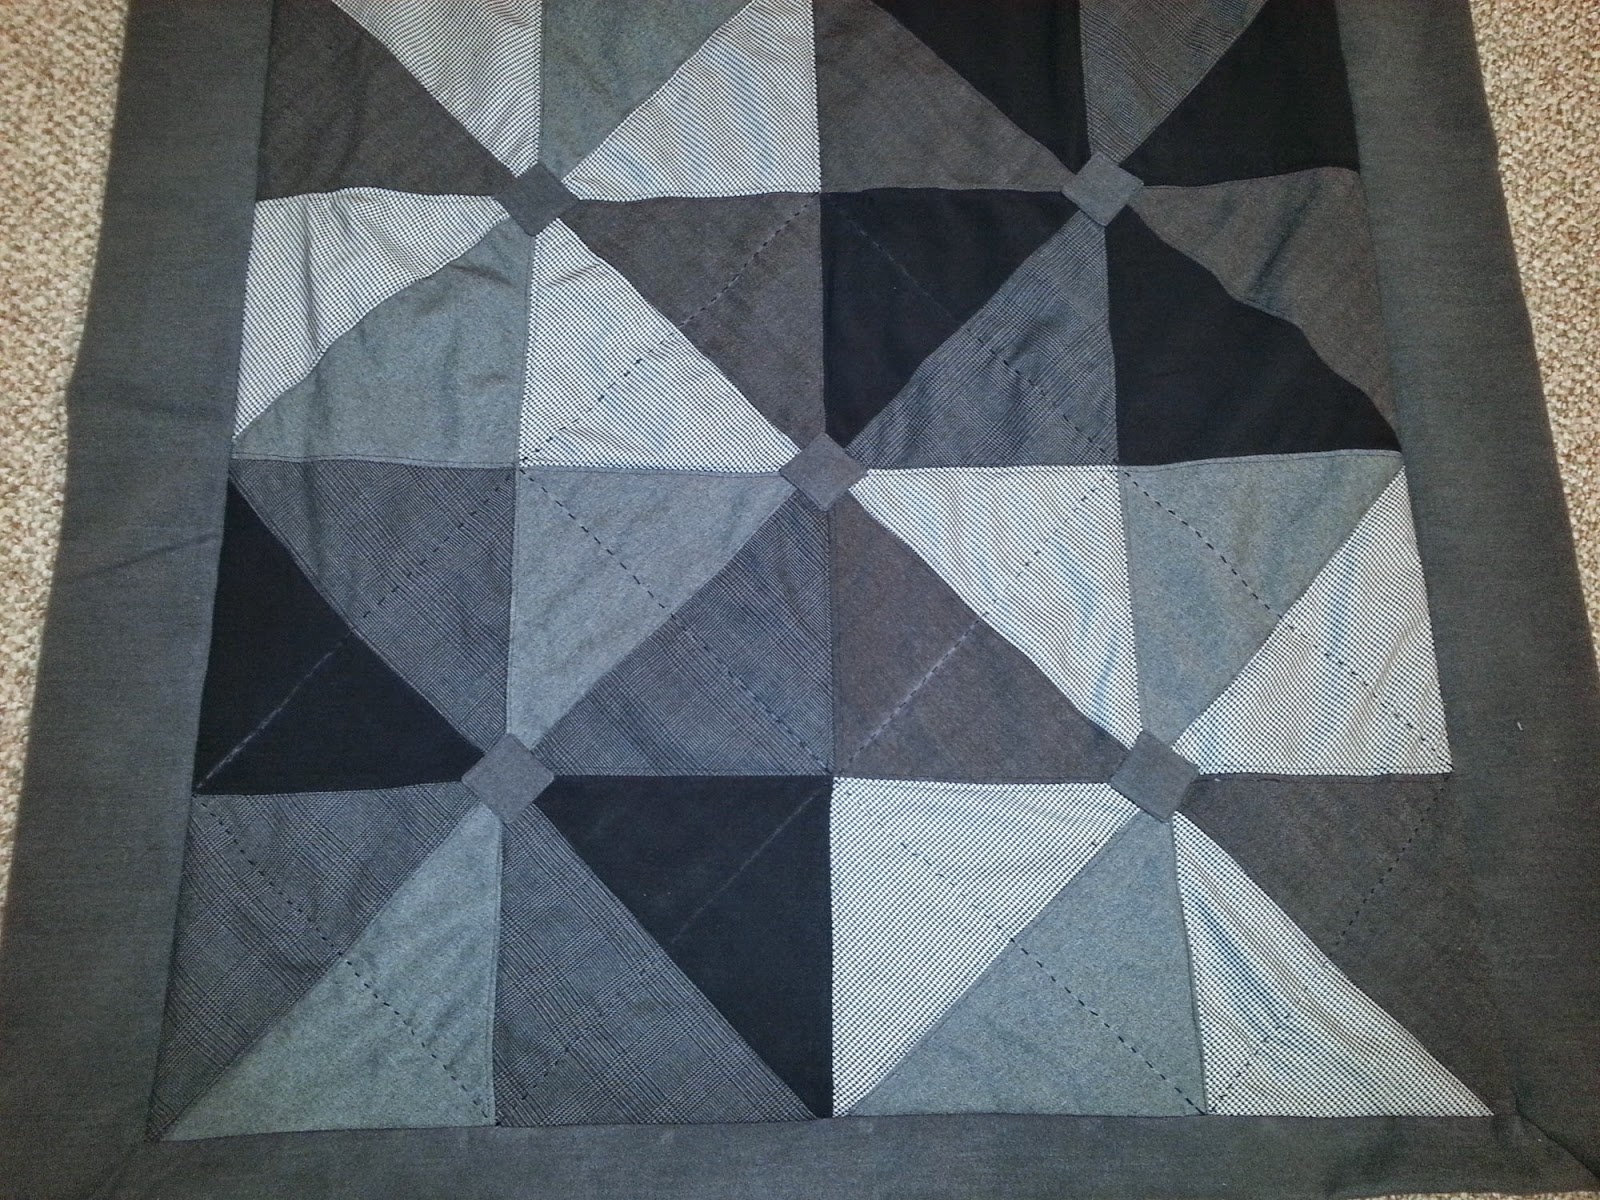
This is a photo of the finished quilt. 
She purchased plaid and plain wool suiting pieces. 
When I got the top, she had the pinwheels sewn. 
Below, you will find what I did to finish the quilt. 


My sister has not made many square patch quilts and wasn't sure of the quilting process. She did not have much of each fabric and had already cut them into squares. I suggested she cut them diagonally to create more visual appeal. I never thought to suggest fusible interfacing for stabilization, so there was S-T-R-E-T-C-H.

After sewing the pinwheels together she asked for help with sandwiching and binding. She had purchased a felted wool for the backing. We thought including batting in the quilt would be much too hot. I suggested it be sewn as a self-binding blanket. (You can see Jenny Doan's demonstration HERE.) I thought large hand sewn quilting stitches to hold the layers from shifting would be cool. So, I took the project home and went at it.

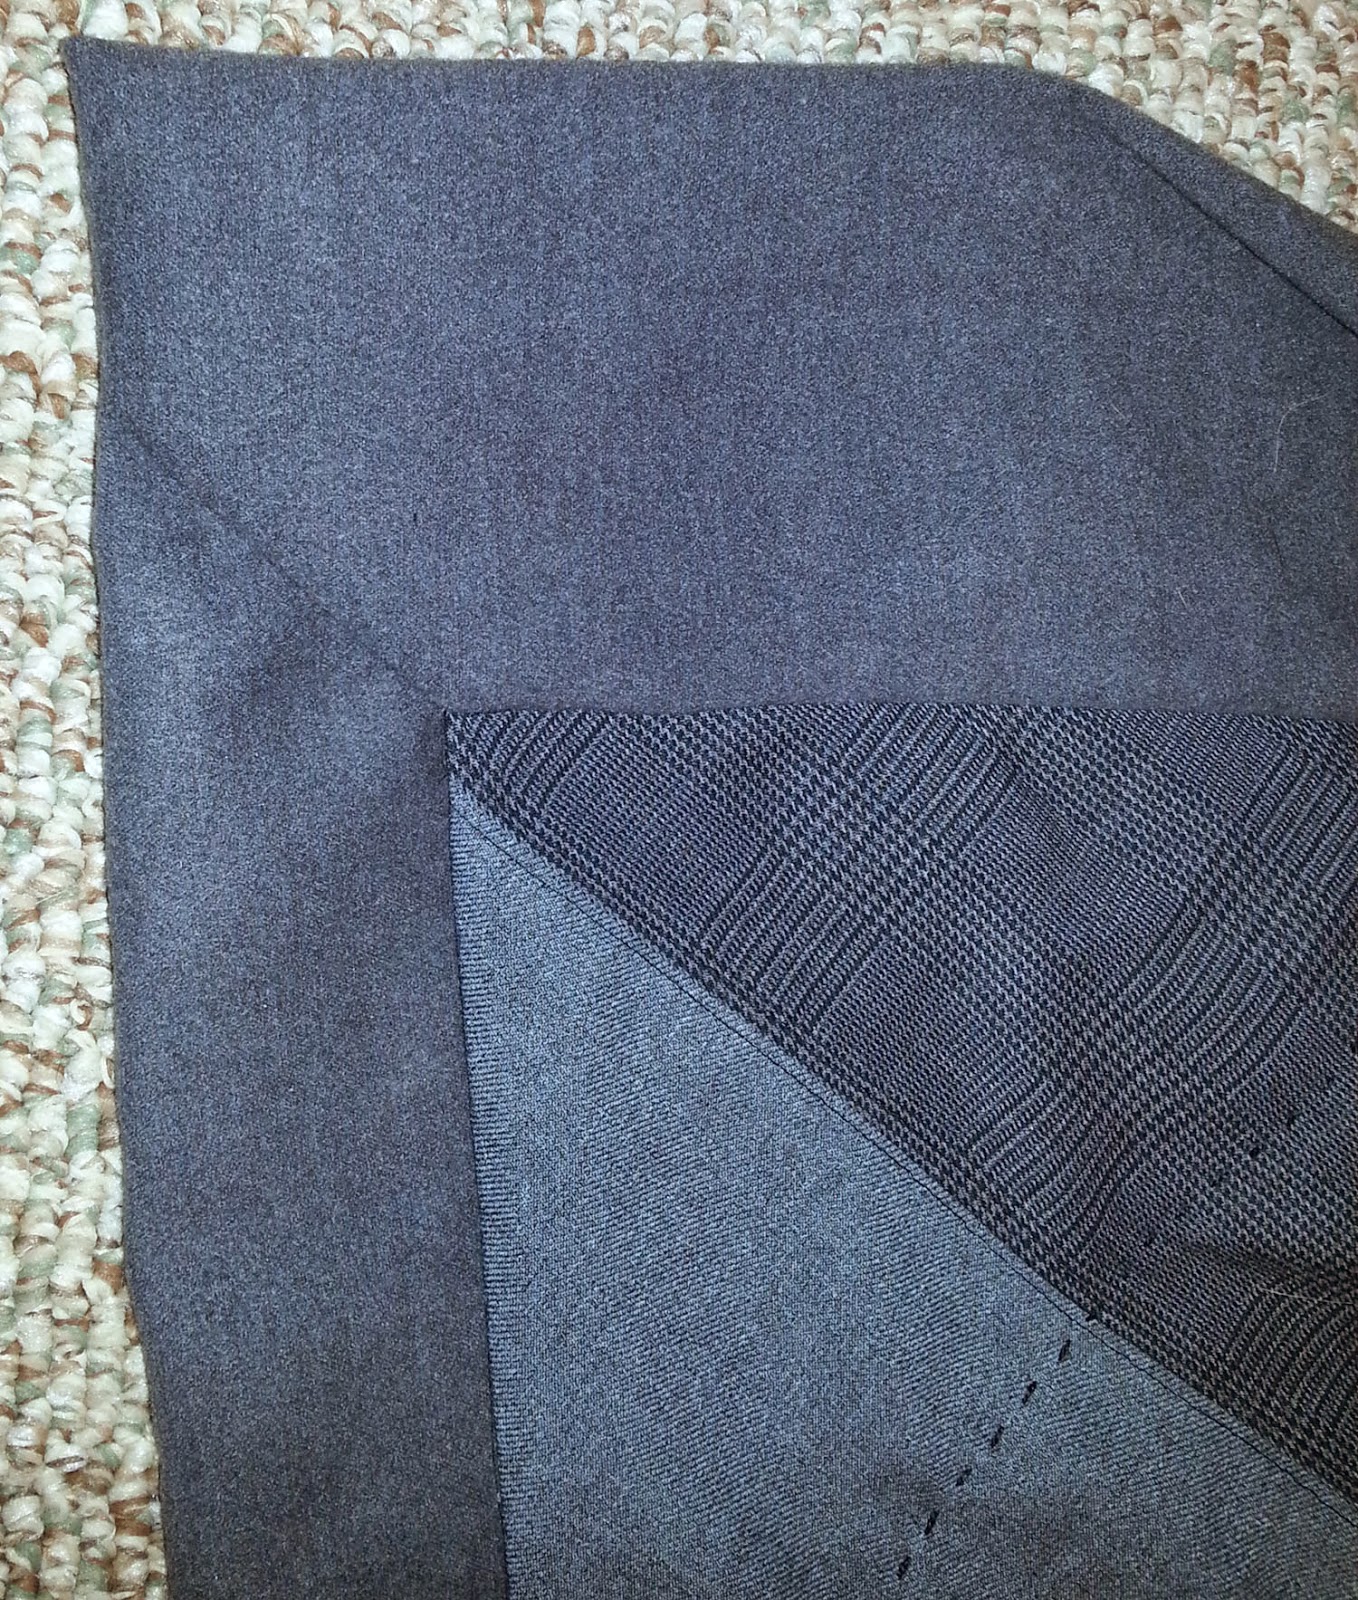
I stabilized the stretch on the outside edges and seams of the quilt with fusible woven interfacing.

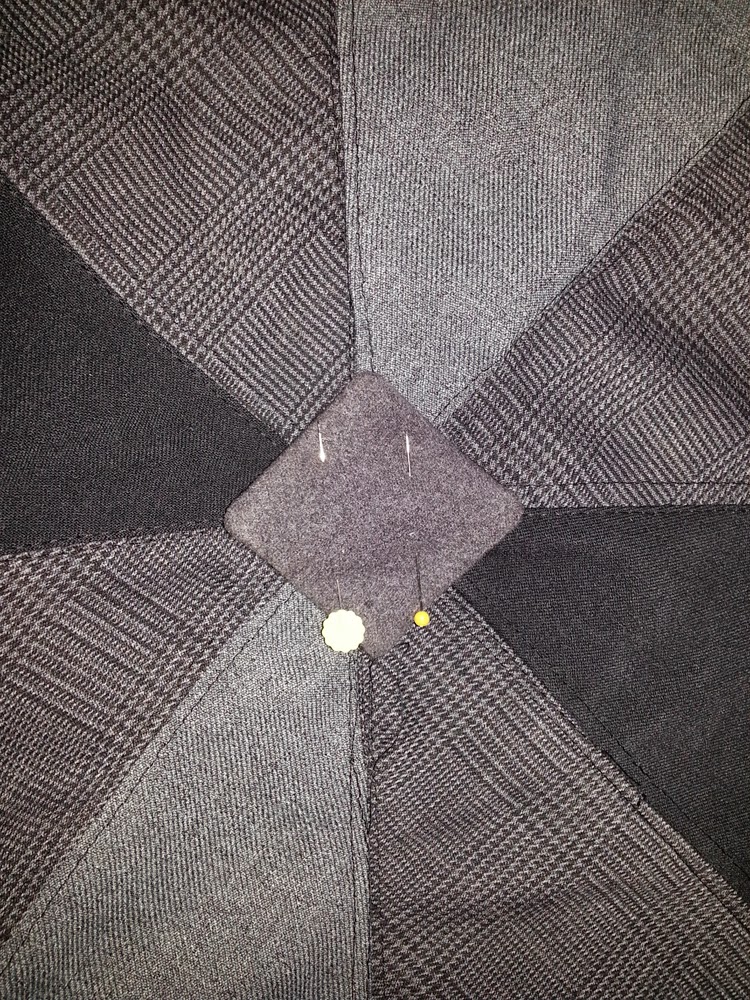
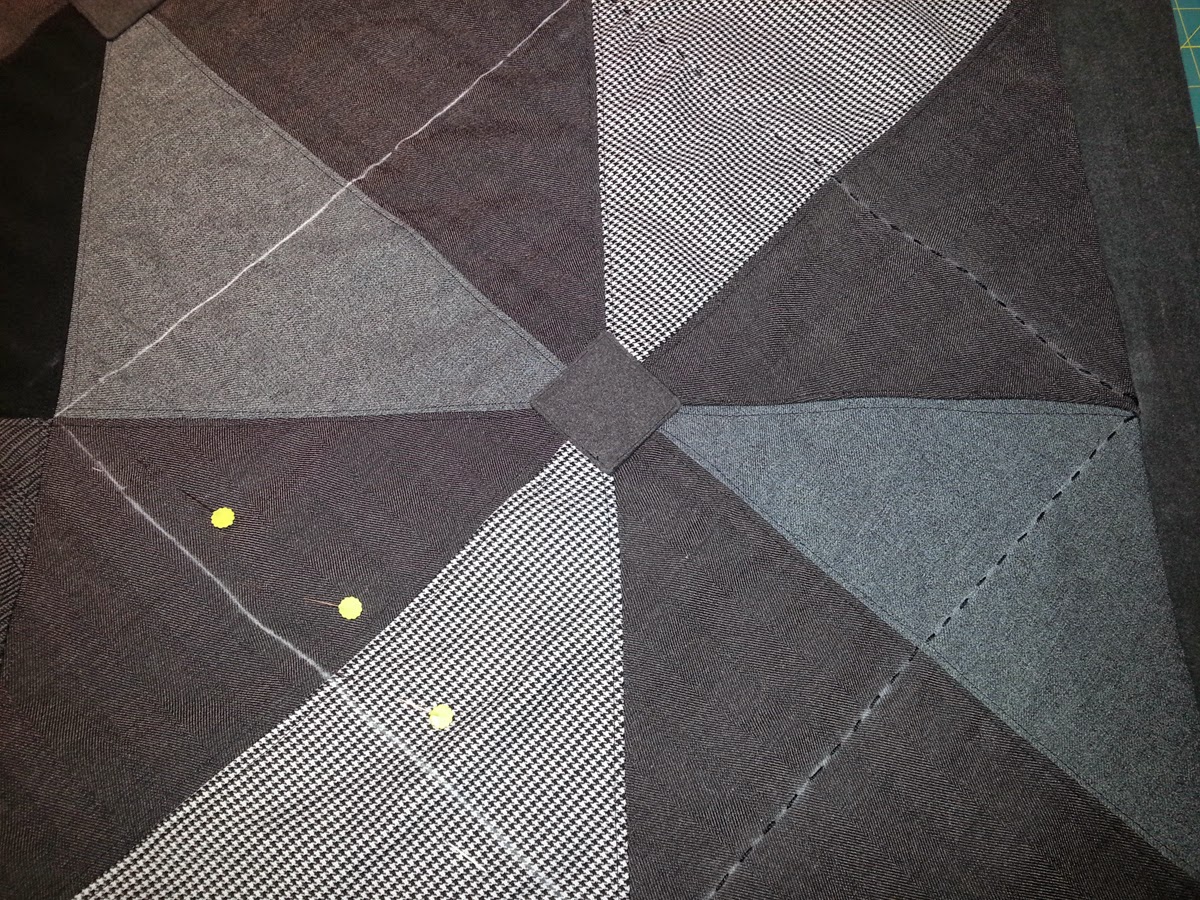
I topstitched 1/4" on each side of the seams.  That helped stabilize the triangles. But, as you can see, the centers were off or puffy. I wanted to do something about those intersections. 


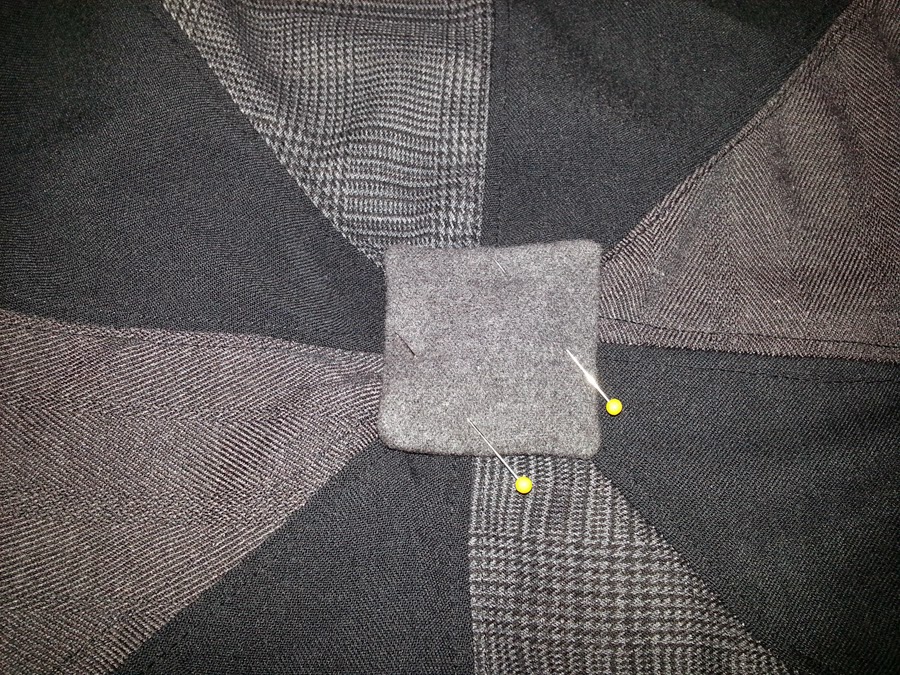
I thought a square would look nice and cover each of the intersections,
 as shown in the next photo. 


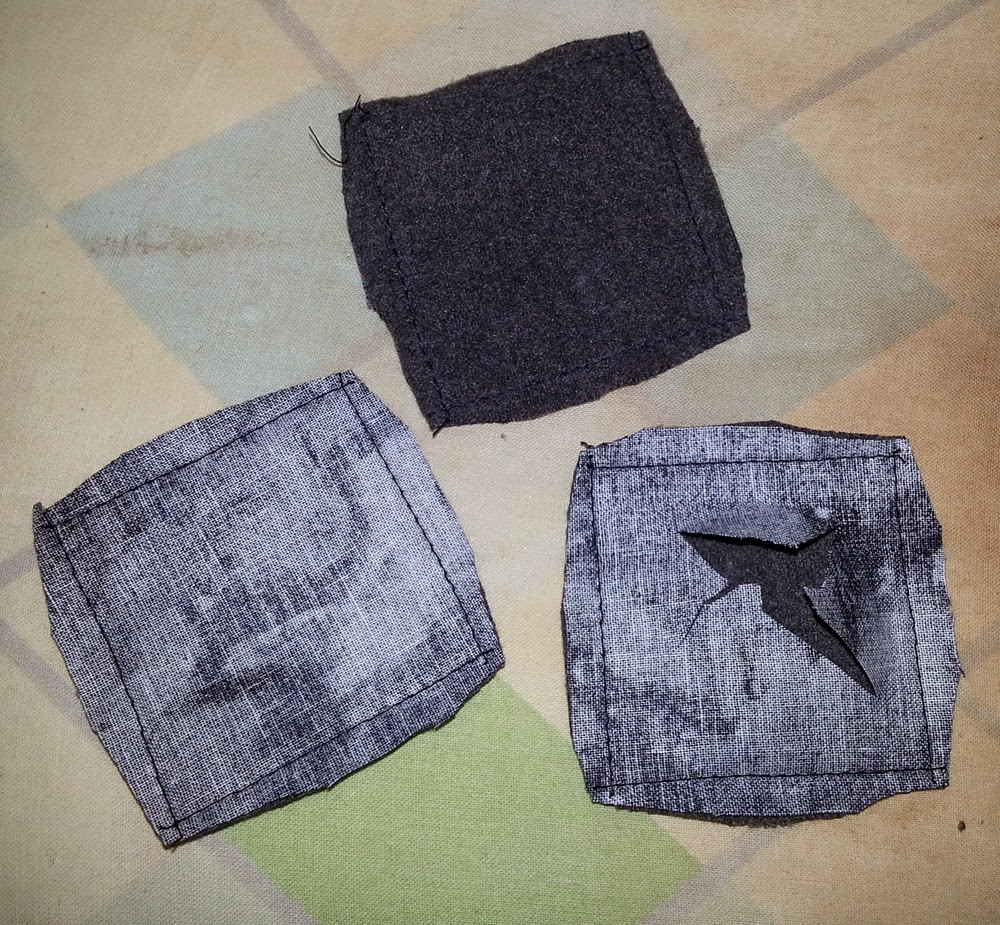
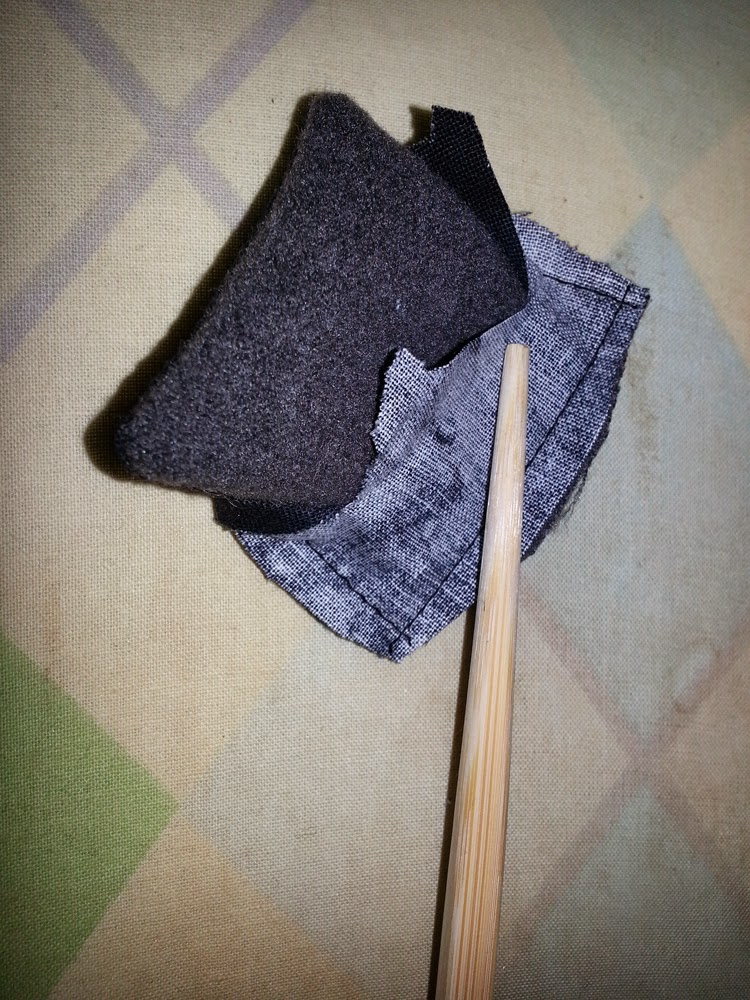
To do that, I sewed one square of the backing fabric and one of a cotton fabric, RST, around all edges. The under fabric would not be seen when appliqued down. I clipped the corners so the points would form nicely when turned right sides out. I clipped an X in the center of the under fabric only, in order to turn the pieces.


I used the chopstick to turn and poke out the corners of the squares and pressed the edges and corners with a bit of steam.


The cut would be hidden so I did not need to close it up.


I pinned the squares on the center seams of the pinwheels and topstitched in place. 


With the squares all sewn down, I measured the quilt top, figured how much backing was available to form the binding on the front. I decided to use all the backing I could, so the binding dimensions were not equal. (But the process of sewing it wasn't much different than if all the binding edges were equal.)


I had to fold the corners a little differently since a 45 degree angle would not work.


 I pinned, marked and topstitched (by hand) with embroidery needle 
and thick pearl cotton embroidery thread as shown below. 


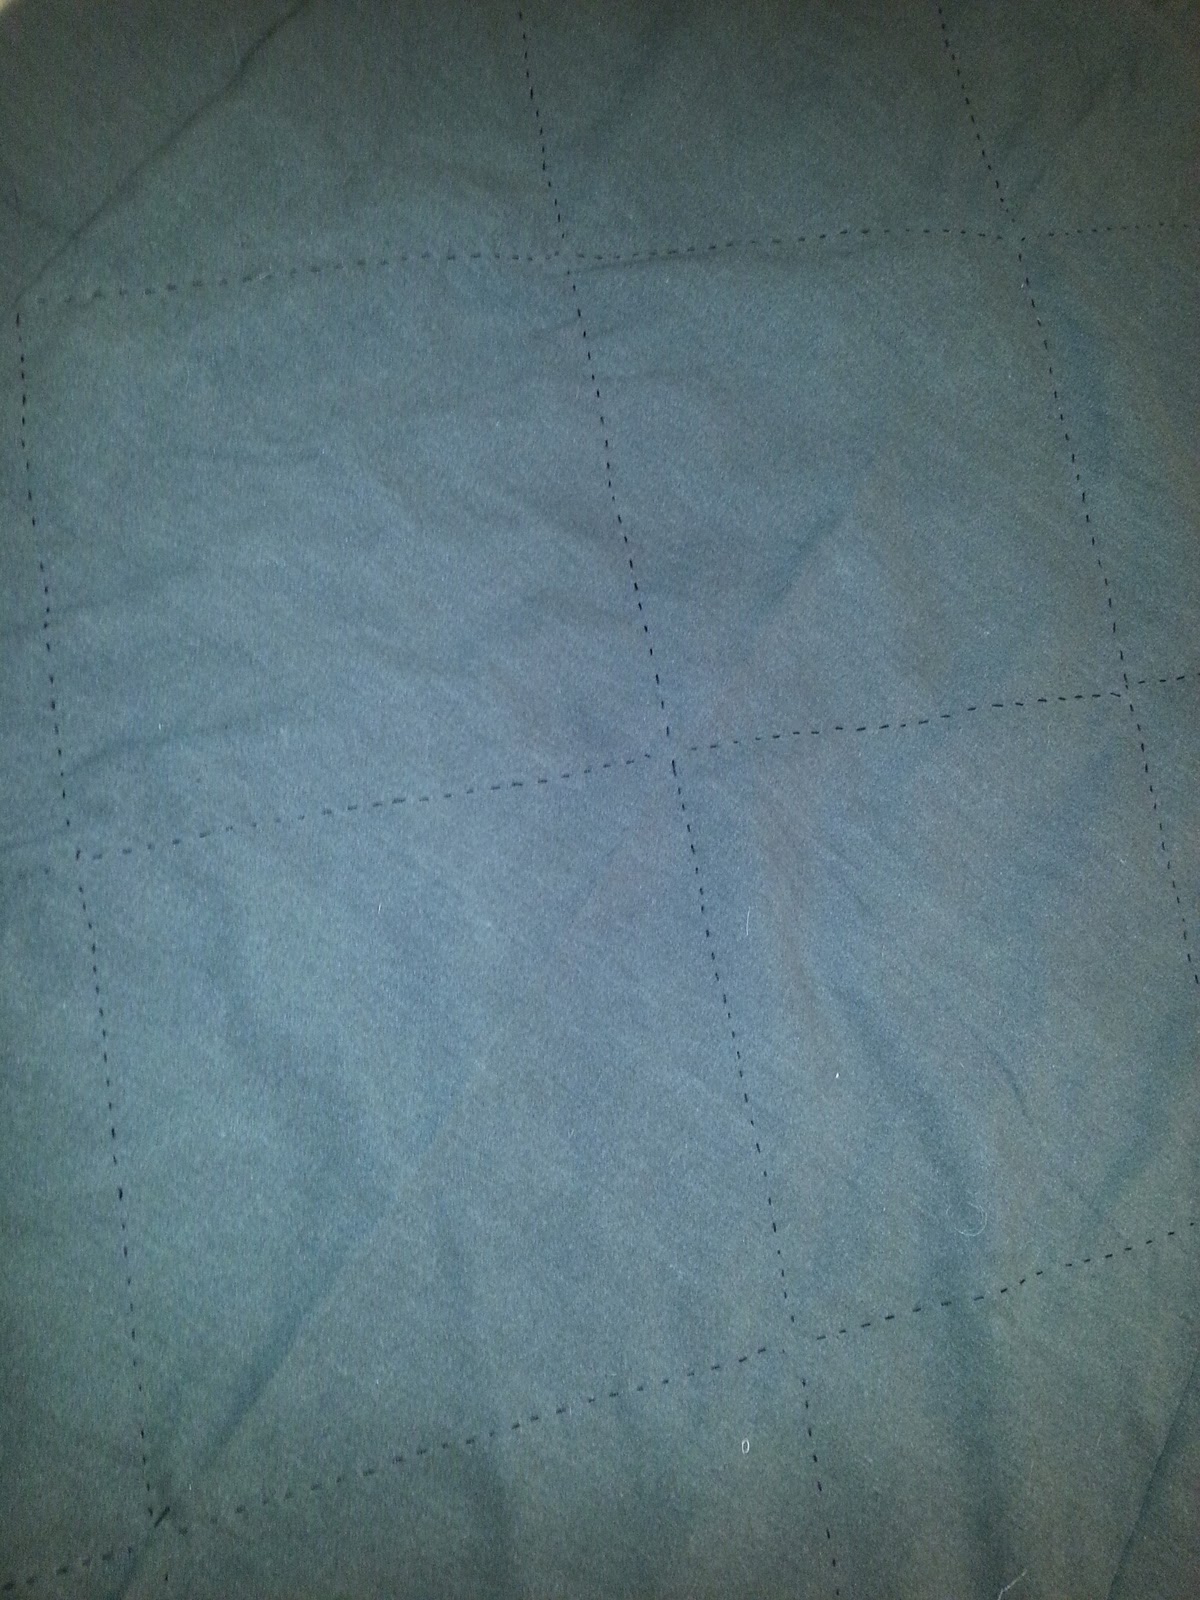
Here is the back. 


Although there were still a few loose areas, the quilt is a lap quilt, very warm -- with temperature and LOVE. I was happy to have helped my sister. She was very pleased with how it looked and my 29-year-old nephew really LIKED it.

Leave a comment and let me and my readers know how you have helped someone out with a quilting project or quilting predicament. 


3/04/2015

Quilt Patterns I Have Designed

Val's Quilting Studio's Tuesday Archives is featuring "Original Patterns by You!" Those who are linking are posting about patterns they have designed for their own use or for sale whether using wool, paper piecing, applique, bags, totes, and/or quilts

I am copying parts of the blogs that I have written about some of the patterns I have designed. Some have been for my own use and others I have for sale. It has given me the idea to put a list on my blog of patterns I have designed.

I enjoy designing my own patterns for a number of reasons. The first is that it satisfies my creative urge. Also, I want to be able to photograph and display my quilts without seeking permission from the pattern designer of a pattern I use. I can share my patterns freely with my friends and with those whom I teach. Lastly, although not prolific, I have some for sale which gives me a little bit of "quilting money" to fund my passion of quilting. 


My pattern, Rings Placemat Set, was designed for Cut Loose PressCut Loose patterns are available to Local Quilt Shops through Checker Distributing. If your local shop doesn't carry them, ask them to put in an order! Here is a photo:

 
Another pattern I designed for Cut Loose Patterns is 
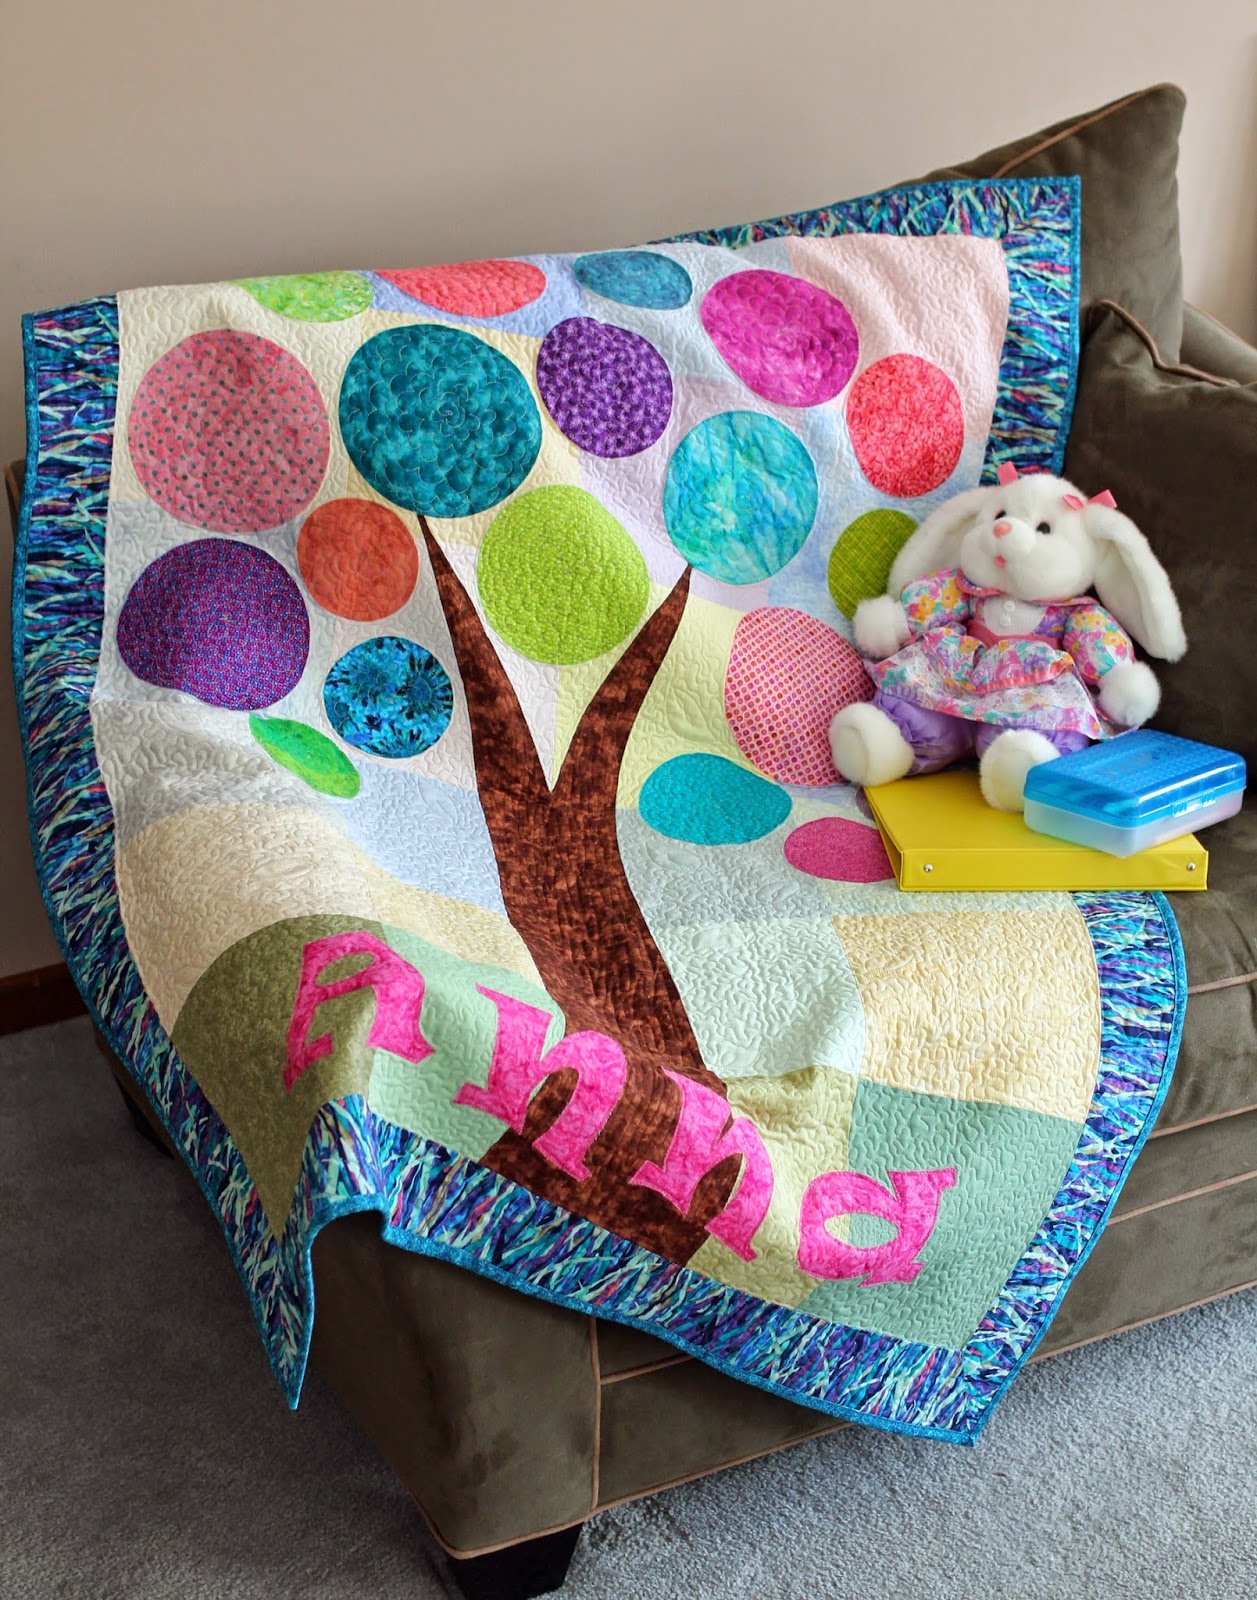
Tree-Mendous Possibilities


It is 2 patterns in one!

By adding just one more fabric after making the "Tree" quilt, you can make a second quilt! And there is almost NO waste.
Start with a layer cake and a few extra pieces of fabric. 
(Or use your fabric yardage cut into 10" squares.)
It is an easy quilt to make. But don't stop there! 

  
Change it up a bit by substituting other materials such as photos on fabric, childrens' art work or handprints, signatures, redwork or embroidery, why even t-shirts would work!
Why not use the letters: BFF at the bottom and have photos of the best friends in the branches? How about a growth quilt?
This pattern has "tree-mendous possibilities". 


And, below, is the second quilt that can be made with the leftovers plus another fabric cut.


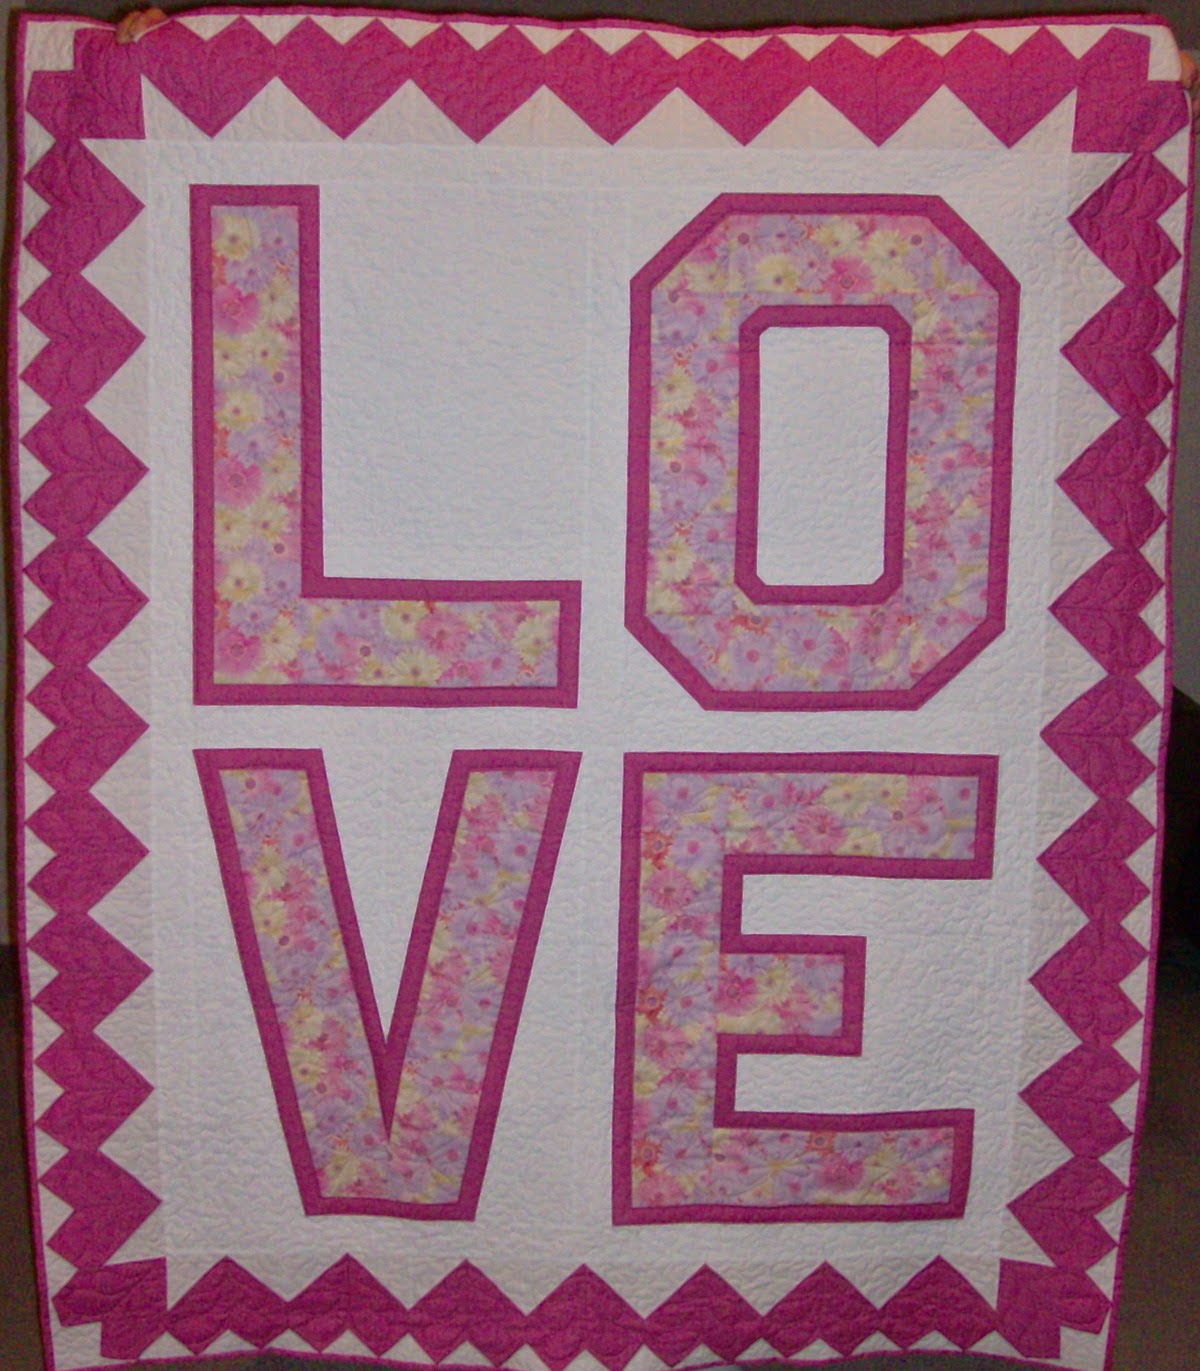
Another quilt I designed has hearts as the border. I wanted it to have the appearance of a postage stamp.


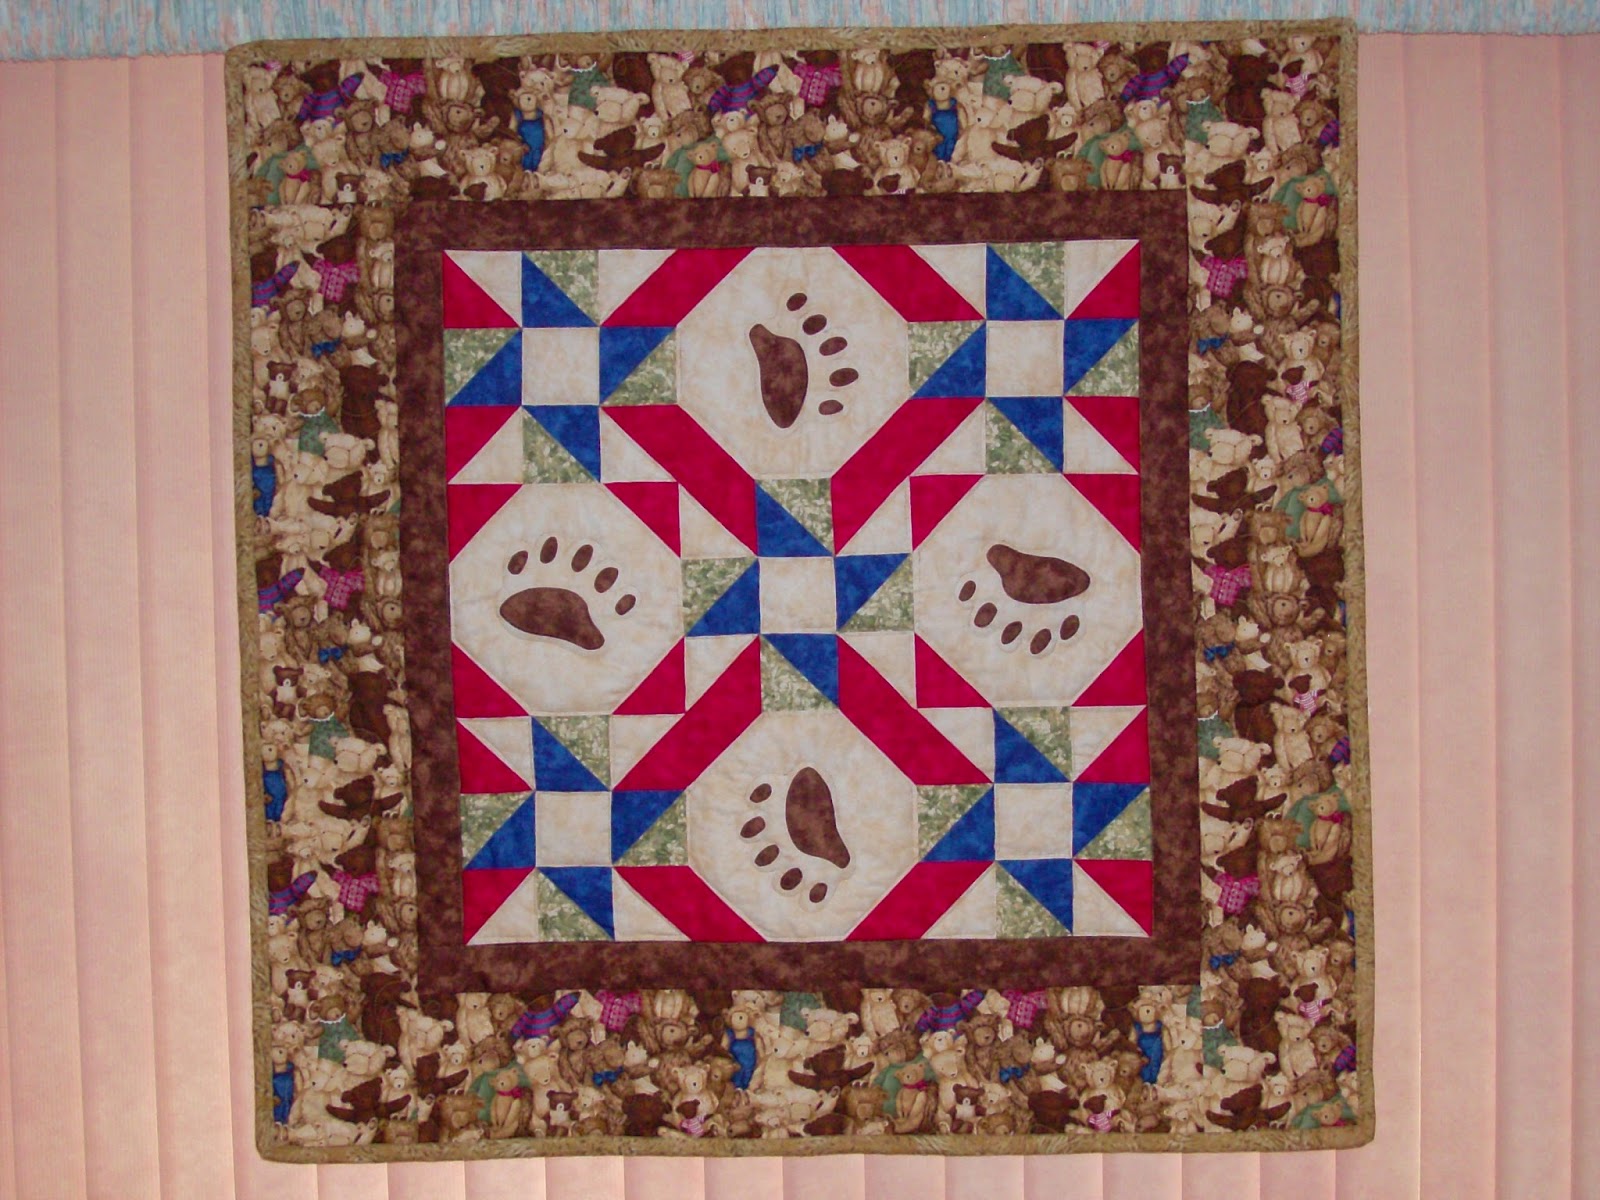
I designed this footprint baby quilt to use the bear

fabric as the outer border. But there are other animal footprints in the pattern so other animal fabrics can be used.
This pattern and 4 others for sale
at Patternspot.com under Patchwork Breeze as the designer.


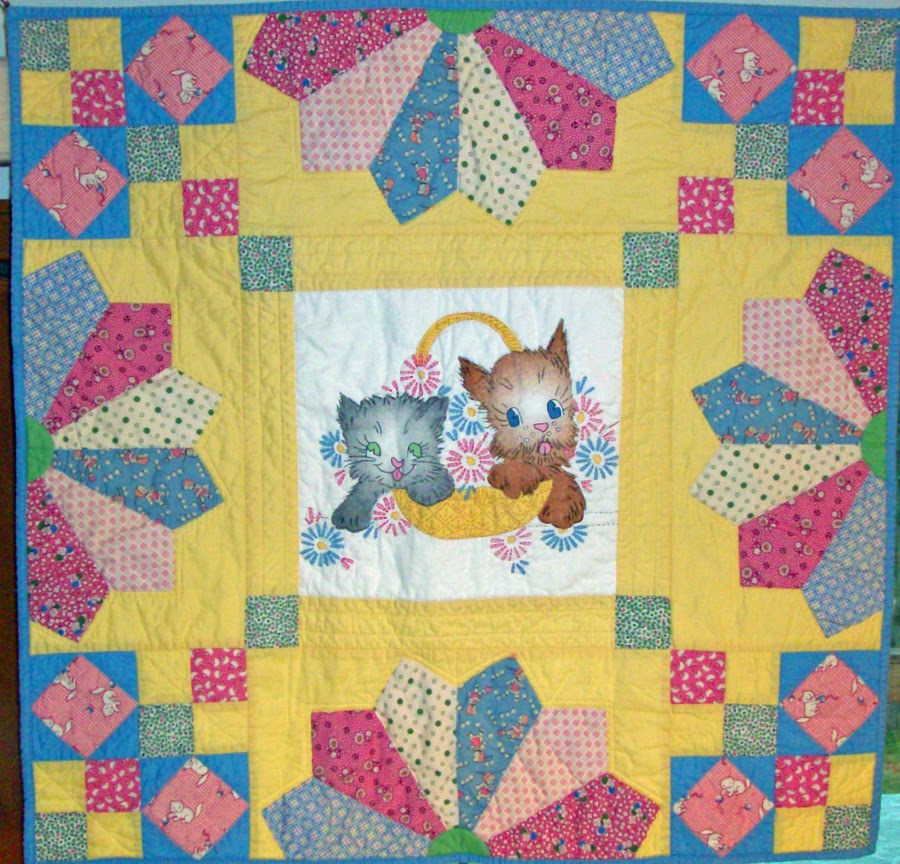
The Kittens in a Basket quilt is my 1930s pattern I designed for a guild challenge to use reproduction fabrics.


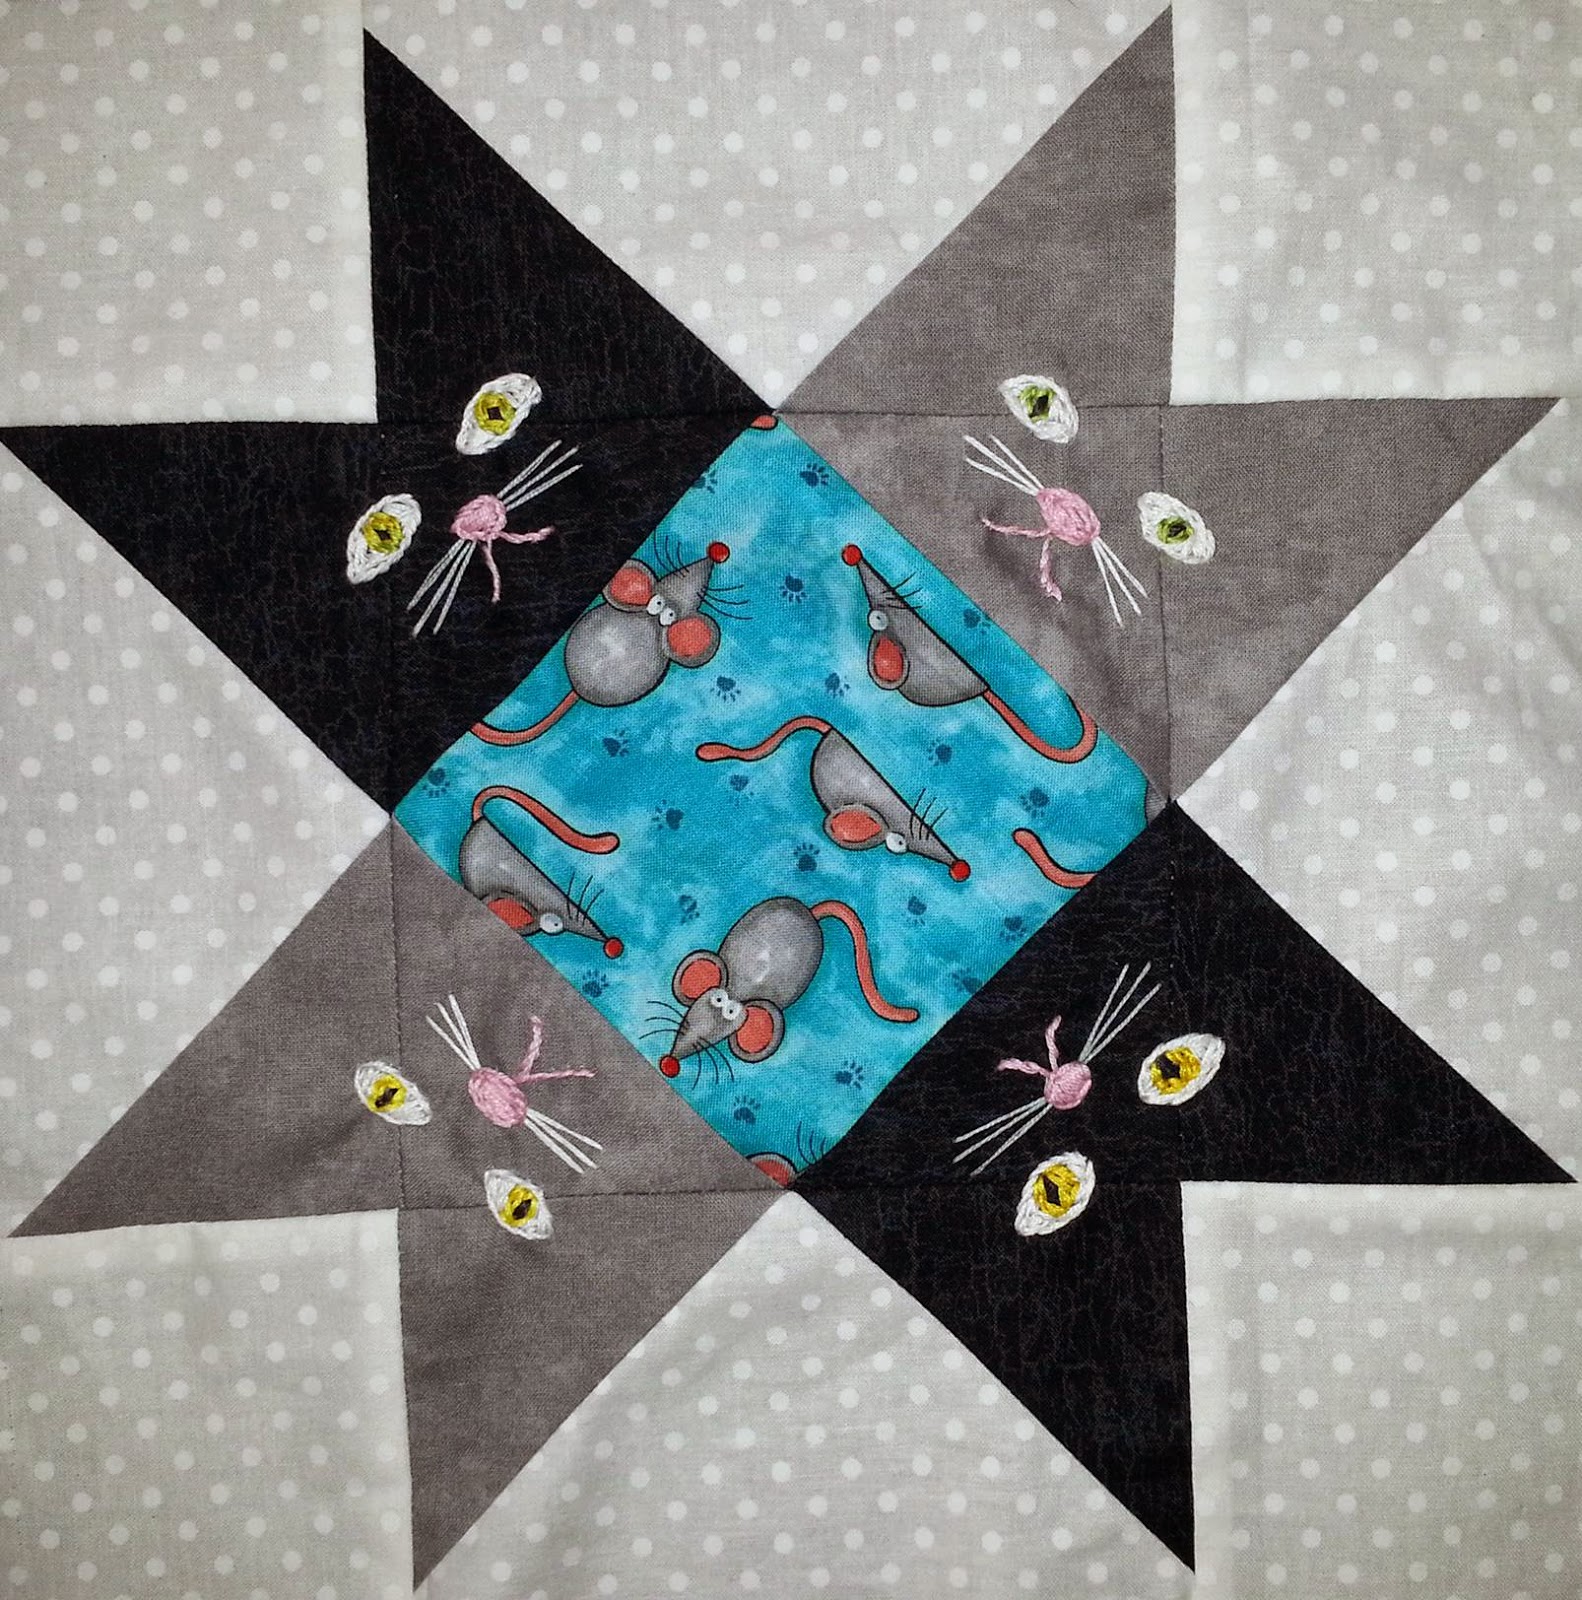
If you'd like a free pattern, try the the CURIOUS CATS block found at PatternSpot.com. I had fun designing it. My inspiration came when I found a photo of a block on the internet. I sketched it, but did not write down the website or blog it came from. It made me think of cats watching something interesting. Maybe fish or mice or bugs! 


1/13/2015

Medallion Quilts on Tuesday Archives Linky

Medallion quilts are the feature of Val's Quilting Studio Tuesday Archives Linky. 

I looked through my past blog posts and found that the few medallion quilts I had written about were scattered like leaves over the Patchwork Breeze Blog; so I have condensed them here. 

I start with the 9/1/14 post of the quilted pool table cover I designed in EQ7 (find the EQ link HERE. 

"Our next stop was about 30 miles away in Paradise, Michigan, the Wild Blueberry Capitol of Michigan and the gateway to Tahquamenon Falls. We had our lunch packed so we stopped at the mouth of the Tahquamenon River to eat and enjoy a view of Lake Superior. We were off to Village Fabrics & Crafts. 


The shop has many woodsy and nature fabric selections as well as flannels and fun children's prints. There is pine paneling inside and so many quilts on display. They have a nice room for sewing and lots of embellishments for the artistic quilter. I could not pass up the Row by Row kit of a bear and moose in the blueberries. I also bought fabric for a blueberry muffin table runner and some Angelina sheets.


It was here that my husband found a fabric panel a few years ago when we stopped that he asked me to make into a cover for his pool table.He really likes and appreciates it.  This is how it turned out. (Hard to get a full photo of a large cover like this.)


From my 4/22/14 post I have 3 to show: 

Another quilt I designed has hearts as the border. I wanted it to have the appearance of a postage stamp.

I designed this footprint baby quilt to use the bear
fabric as the outer border. I have the pattern for sale
at Patternspot.com

The final quilt for today is my 30s Reproduction
fabrics with a center panel of kittens in a basket.
This was for a guild challenge using 30s prints.
While I thought it was great, there were others
even more spectacular.

Thanks for visiting, visiting the linky blogs and we all like to read comments, so don't be shy, say hi and tell us what you think.