2/28/2014

A Trunk Show, A Hint of a Pattern and a Giveaway

The Tall Pine Quilters Guild had a trunk show at the February meeting. Robyn House-Guettler brought so many of her quilts. I have known Robyn for many years, having met her at a family reunion when she was young. Her mother is a quilter, as were her grandmother and great-grandmother. We attended many Mystic Lake quilting retreats together. She is a wealth of quilting knowledge and skills.

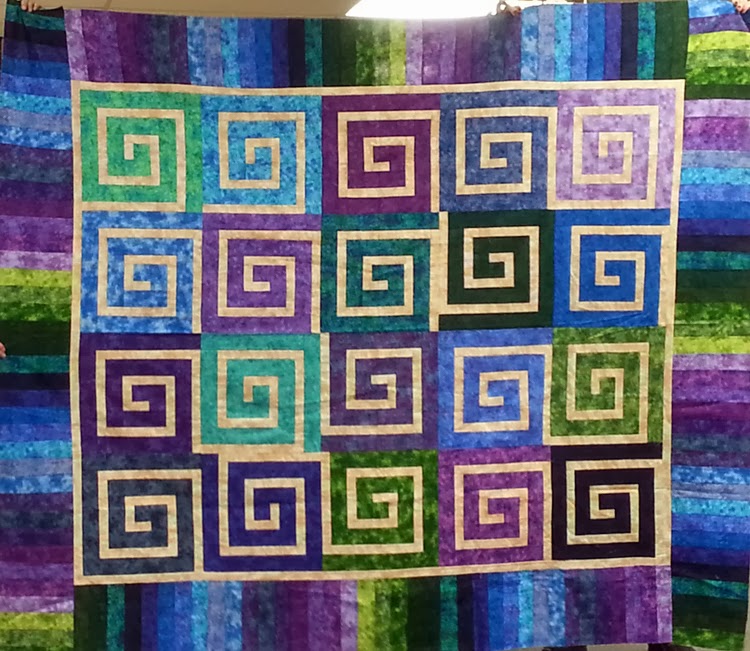
Robyn's quilts were stunning. She is now publishing patterns. I bought 2 patterns and have them in my TO-DO basket. I will share a few photos with you, with her permission. She has information on her Facebook page named Between Patches. Unfortunately, the only photo I got of Robyn was not flattering, and if I posted it she would probably cut me off as a shirt-tale relative.


And My Projects: 


What in the world could I be doing sewing all these strips together?  Yes, I asked myself the same question when I got half way through! I signed up at the LQS to participate in a "sewn strip exchange" related to Edyta Sitar's book, Friendship Strips and Scraps. Well, I signed up to sew 5 sets of strips which had to be the 18" x Width of Fabric. Of course I waited until the last possible day and spent well after midnight last night sewing. I got them done and will take them to the store today. I am not sure what I am going to make with the 5 strips sets I get in return, but I am sure it will be a fairly large project. Any suggestions?


I made 2 paper-pieced log cabin blocks for the annual guild quilt project.


New Pattern in the Works
I can't give details right now, but I am working on my next pattern for Cut Loose Press. I have a deadline in order to have it ready for Spring Market. I will give you just a little photo hint. 

      
Scraps put to use. 
I can't throw away most scraps. So from the projects I have been doing, I am using Angie Padilla's suggestion of turning  them into fabric collages. (She has lots of other ideas for scraps at her website.) So I lay them on a batting scrap near the cutting table to be sewn and then cut into inchies, made into a cosmetic case, etc. Presently, I am making a tiny landscape in the style (and I use that word loosely) of Ann Loveless, from whom I took a class a few years ago.


Spur of the Moment Giveaway! 
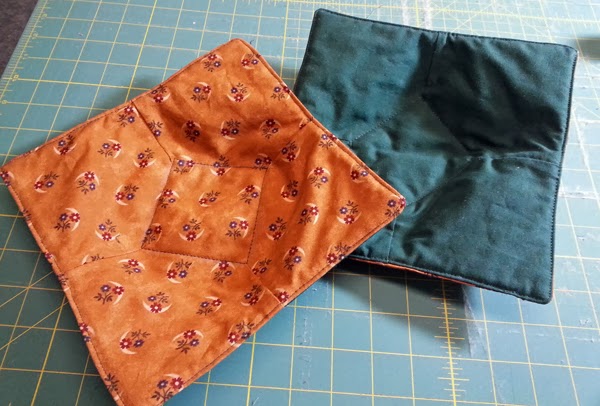
Microwave Bowl Cozies are my latest project. I am making them to sell at the Gala Gourmet, a local kitchen shoppe. I will be able to use some of my large cotton fabric stash for these. The photo shows just 2 of the many that I have made. They are reversible. They are made of totally 100% cotton materials and come with instructions for use. They are like a potholder that can be used as a pretty server under your bowl of oatmeal, soup or whatever from the microwave. Just hold opposing corners as you take it from the microwave and you are all set. 

In fact, I have just decided to have a SPUR OF THE MOMENT GIVEAWAY. Well, heck if you have read this far, you should have a chance to get a free cozy. So leave a message, giving me a suggestion of what to do with those strips I am going to be receiving. I can't tell you what fabric colors your cozy maybe, but we can probably work out some pleasing colors.

However, I will only be able to send to a winner within the United States. One winner will be chosen on Wednesday, March 5 at 9 PM EST. In fact, you can earn a second chance by signing up to follow my blog, leave me a second comment telling me you are a follower. And what the hay, share this Spur of the Moment Giveaway on your website or blog and leave me the link for a THIRD chance! But remember to leave me a method of contacting you. Anonymous comments go to my spam folder.
Happy Quilting!

2/14/2014

Some Quilting Love

Happy Valentine's Day

I thought I would pass on wishes of quilting love to everyone by posting a few photos of some of the Heart- and Love-themed quilts I have done over the years.


"Surrounded by Love" pattern available
soon via Patternspot.com (Pattternspot is no longer

in business.)
"Path of Love and Peace" quilt
designed for The Quilt Show Challenge Big Love in 2010.


"Water Color Heart" finally quilted in 2013 after
sitting in a box for 8 years!


"Love You" wallhanging designed for my
daughter's dorm room. Pattern available
at Patternspot.com.

"Storm at Sea" sure has a Valentine color theme! This I made using
the Square in a Square technique for a class I taught in 2013 at
The New Ewe.

My paper piecing pattern from PaperPanache's MysteryBlock #64. Find free mystery paper piecing blocks
free for one month on this site plus LOADS of
other patterns to purchase.

A quilt top made in 2012 using pink and purple scraps and a pattern I
received in a magazine subscription offer (don't remember
which magazine, but many of you may have had the same pattern
delivered to you). The top went to the quilter and now is awaiting
the binding. A gift for a friend's daughter. 


"Sweet Chocolates" was my own wall hanging design made in 2007.
The white represents the sections of the box that the candies
set in. They are squares folded diagonally, sewn into the
corners of the candy fabrics and then rolled outward to create a
curve so the candies are not so square looking. The sashings
say it all.


Finally a Row Robin organized by the 
Tall Pine Quilters Guild back in the early 2000s. 
My block was the top fan section. I chose the colors and was 
glad that another member made the hearts. The log cabins in the middle 
are really houses. They don't show up well, but the create a sort of heart shape
over the baskets. I hang it in my hallway each year. 

HAPPY VALENTINE'S DAY 
AND 
HAPPY QUILTING!

2/12/2014

Organizing and W of B Block

ORGANIZATION ACCOMPLISHMENTS

As I mentioned the other day, I would post a few photos of the organizing I have been doing in my studio with the help of my son-in-law. I must say I was not sure about his plan to accomplish this task. But, for a few days, I left the area and let him pull it all out!. He asked me how I wanted to go about this or that, or what the purpose of this area would be. In the end, it has been very successful. I realize I can create, but didn't have the greatest knowledge of organizing. Now to keep it organized and get on with my creative projects!

The numerous and strangely folded fabric cuts have been folded into somewhat "standard" sizes and organized by color and/or contents so I can see some of the main print or color.

Walking in door to "storage room."
Batting in back corner. I have enough for soooooo many projects!
Moving into the room a bit further.
I will have plenty of fabric for many years of quilting.
Embellishments for sewing and card projects.
I have stacked drawers for scraps, each drawer catagorized by colors. This made it so easy to get fabrics for the Women of the Bible blocks I am making. I have my rubber stamps for card making (and fabric embellishment) in the Iris brand drawers at right.


A small desk area for planning, private journaling or design.


This table had been a collection spot piled up with so many things. I am happy I have reclaimed it for its original purpose--to hold my laptop and a spot for designing with EQStitch! 


Women of the Bible Block

I have Sarah's block done. 

I am working on Hagar's block and will to Lot's Wife's block soon. I am keeping up with the readings, but not the blocks. 


2/10/2014

Sewing Little Things and Lots of Organizing

Little items are what I have been sewing the past few weeks. I have not had much time to sew large projects. I took the advice of a blogger (I don't remember who) to break the things we need to accomplish into smaller steps. That way we see progress in each thing we do.

So after getting through my father-in-laws' passing and funeral at the end of January, I listed small steps. And what I accomplished was: sewing a bunny, stuffing it, making a carrot, and finally it was complete! I gave this one to my daughter who wanted one after I made one for my pincushion swap partner. She wanted it for decoration because it was so cute! 


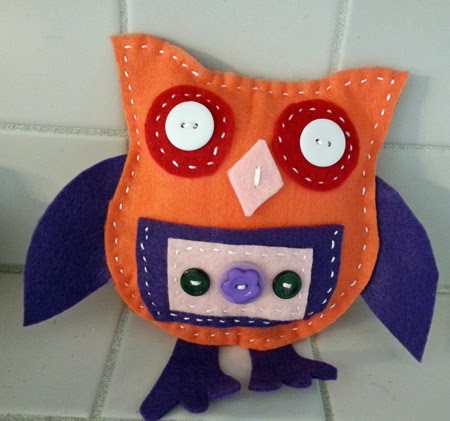
Then I gathered my felt, cut out pieces, found the buttons, and began stitching and finally stuffing to finish the Wishing Owl sample for a childrens' class I will be teaching at the ArtsPlace on February 22. 


For a few hours each day I organize an part of the sewing or cardmaking areas of my "studio." My husband has been so patient. My son-in-law so helpful and I am seeing long-overdue success. My daughter is looking forward to doing some cardmaking very soon.
I will post photos tomorrow.

Breaking a large task into smaller steps is helping me get things finished. What can you, or did you list in smaller steps in order to get it done?

2/01/2014

Four in Art Reveal

Urban Structures Reveal

Today is the reveal of the Four in Art Urban Structures theme for this quarter. I am happy with the results of my piece. I did more than a month's worth of thinking, sketching and pondering as to how I would depict Structure under our theme of Urban. I had so many ideas; some of which I will use in later projects. What I did execute was the use of words used in the building trade to create the piece. There are a number of words on the quilt, in fact, every part of the building contains printed words. From a distance the quilt looks like a building. But it is interactive, as the viewer will approach the quilt to examine it and begin to "read" it.


In an AQS class taught by Bill Kerr this past August, he told us that if one were to use fabric with words printed on it, there should be a number of word prints throughout the quilt. Otherwise, people would focus on the few words on the quilt and lose the ability to view the entire quilt. 


I wanted to use my computer printer to print on treated fabric for this project. I had so many thoughts on what to print, but the final idea came from my memories of building a treehouse with my dad as a youngster. He believed that even I, a girl, should learn to use tools. Then my husband and I built our own house during our first year of marriage with the help of his father and some friends. It was a wonderful experience. 

I have built many things using mostly wood; but, to build the home we lived in for 5 years was a great accomplishment. I have always viewed with awe, the buildings that people have constructed. From that of early man, the longhouse, wigwam, sod house, lean-to, or log cabin, to such great structures as the Eiffel Tower, the castles of Europe, the Empire State Building, Taipei 101, and the Tashmahal Hall, to name but a few. So with that I decided that I would print words on the printer fabric and construct a building--the shape of which one might see in an urban setting. I titled it, "Building Structures in Urbanania."


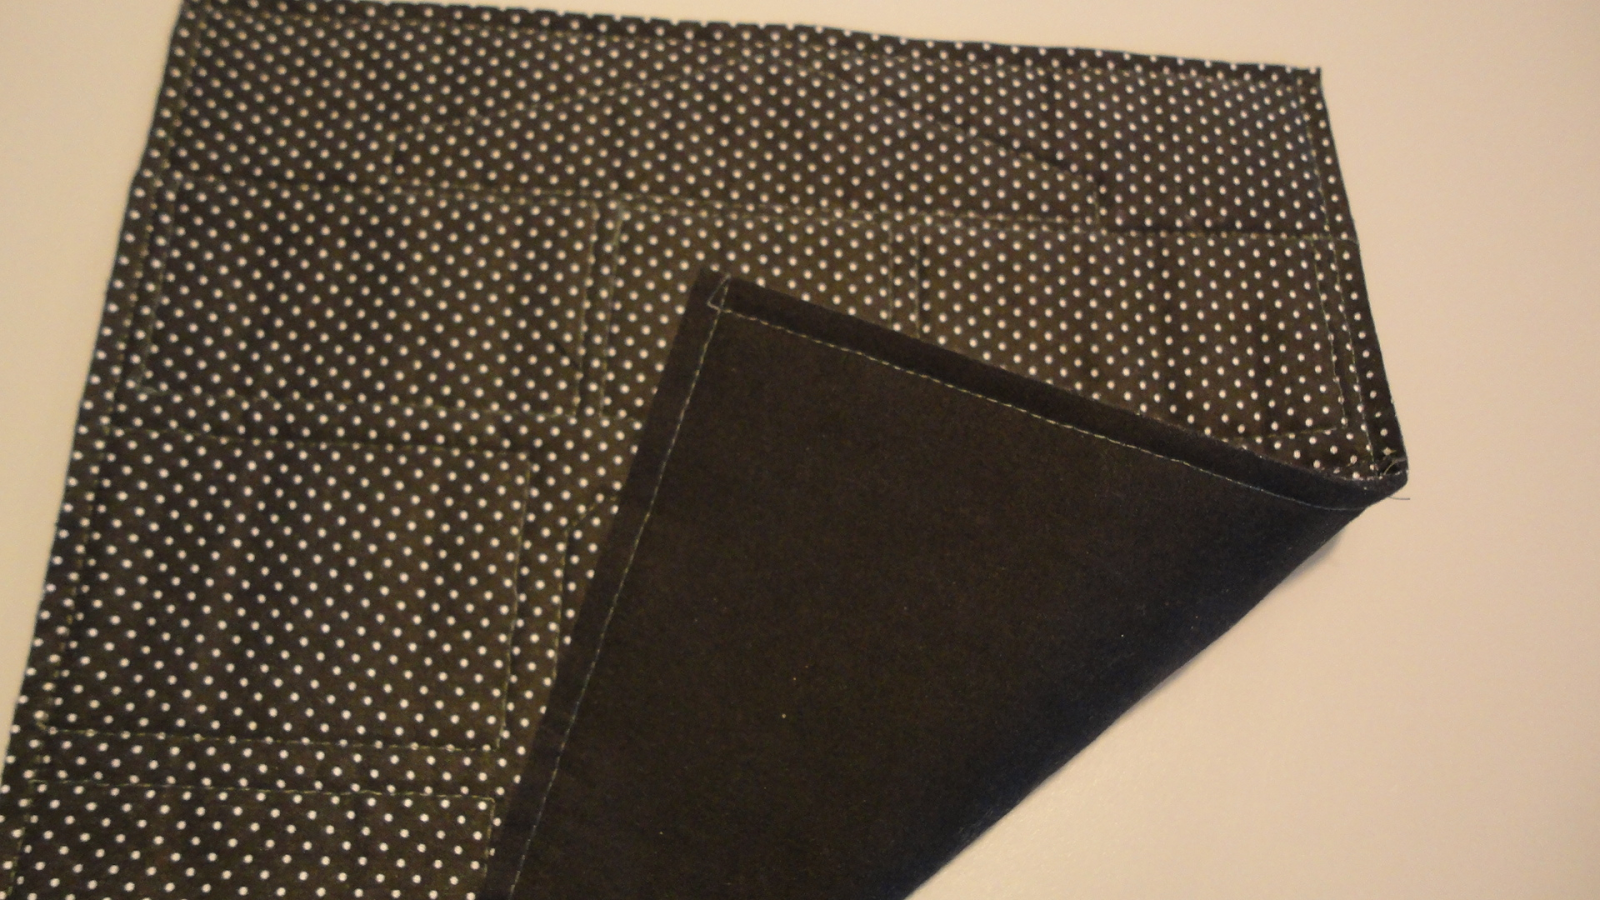
I did not put a binding on this project. Instead, I quilted the 3 layers, then trimmed to 12-1/2" square. Using a technique I saw Ricky Tims demonstrate, I covered the front with a solid black fabric, right sides together, and sewed around the entire perimeter. 


I cut a hole in the solid black piece that covered the quilt front and trimmed off the corner tips. This allowed me to turn the solid black piece to the back and the corners did not bunch.


I sewed the raw edge under by hand as if appliqueing. Ricky Tims makes wonky shapes on his quilt backs using this method, but the circular shape suited me just fine.


I attached a printed label, this time including the Four in Art logo.


Have you been able to try a new concept on a quilt project, or make a small project using some new idea? What was it? Leave me a message telling about it. 

Take time to visit the other Four in Art projects revealed today.  Here is the list:

Amanda @What the Bobbin
Anne @Spring Leaf Studios
Rachel@Life of Riley

Carla @Lollyquiltz
Elizabeth @Occasional Piece-Quilt
Betty @Flickr Site
Leanne @She Can Quilt