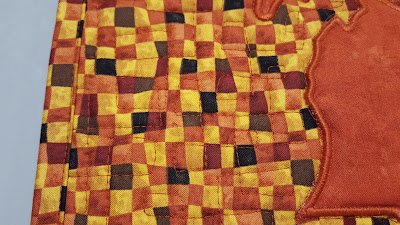
I used this technique to make the construction of our guild quilt project easier and quicker.
I have made 3 table runner flimsies from this technique and will go through the steps here. This post is filled with photos to help explain.
You will need
- 5-inch fabric squares (or a charm pack) of your choice. (Once you see how this technique works, you can change the size of the squares the next go around.) Your chosen runner length will determine how many pieces you need.
- Light-weight fusible interfacing 17" wide by your determined runner length. Most interfacing I buy is 17" wide. (The diagonal measurement of a 5-inch square is approximately 7.25 inches. When sewing, you will loose 1" of the diagonal measurement on each square. I found that fusible cut 36" was 31" after sewing. Use 7.25 inches to figure the runner length.)
- Temporary glue stick
- Ruler (6" x 24")
- Permanent Marker
- Large sheet of white paper, or a white or light tabletop (but marker might bleed through interfacing)
- Iron
Directions:
Lay the interfacing on the white paper (or tabletop) with bumps down. Lay the 45 degree line of the ruler along the long edge of the interfacing.
Draw a line along the long edge of the ruler onto the interfacing.
You will have to
slide the ruler to draw the line to the opposite edge. Sliding the ruler keeps the interfacing flat.
Then slide the ruler 5 inches in one direction (see thin blue 5" line). Keep the 45 degree line alinged with the edge of the interfacing. The marker line needs to show INSIDE of the 5" line (arrow) to keep the spacing correct.
Continue drawing lines 5 inches apart like this so the lines in this direction fill the length of the interfacing.
Now align the ruler perpendicular to the lines previously drawn, as shown below. Begin drawing lines 5 inches apart in this direction. The diagonal lines previously drawn should align with 5 inch marks on the ruler.
This is what it looks like when lines are all drawn.
Trim the edge so the interfacing squares create a symmetrical pattern.
Flip the bumpy side of the interfacing UP. Layout the fabric squares on the bumpy side of the interfacing in a pleasing way. I actually changed a few around after I saw them in my camera.
The edge pieces will have to be cut in half. I used both halves in the table runner.
Use a temporary glue stick to put a dab of glue under the center of each piece. This holds it in place when transferring it to the ironing board to adhere the fabrics to the interfacing.
Transfer the entire piece to the ironing board. I carry it on the white paper. Press according to manufacturer's directions. Once fused, the pieces will stay on.
SEWING
Fold on one line, right sides of fabrics together, sew with a 1/4" seam.
Sew all the seams that run parallel to the first one sewn.
Clip the lines that run perpendicular to the seams just sewn. DO NOT clip past the seam line, just up to it.
The clipped seam will open in opposite directions.
Press each column in the opposite directions.
Fold the edge with a clipped seam so the fabrics are right sides together. The clipped seams will go in opposite directions. Sew a 1/4 inch seam (shown with red line). Continue with all the seams.
The table runner flimsy will be finished now.
The points of the squares are aligned with no pinning, no stretching.
Finally, trim the little seam points hanging out. Add a border if you want.
Layer with batting and backing for quilting.
I made a watercolor quilt with this technique and it has the softest feel. It is not stiff.
I hope this is a technique you will try.


